How to use the new Google Photos editor
When Google announced the Pixel 5 and Pixel 4a 5G, it didn't just launch two phones with impressive cameras; it introduced new Google Photos editing features as well. Improvements to machine learning, artificial intelligence, and user interface mean that users will now be able to do more with light and portrait mode after a photo is taken. They will also have more granular manual controls. We'll show you where to find these features in the Google Photos app, and how you can use them to make your pictures even better.
Products used in this guide
- New flagship: Google Pixel 5 ($699 at Amazon)
- Penultimate Pixel: Google Pixel 4a 5G ($499 at the Google Store)
How to use the new Google Photos editing features: Manual controls
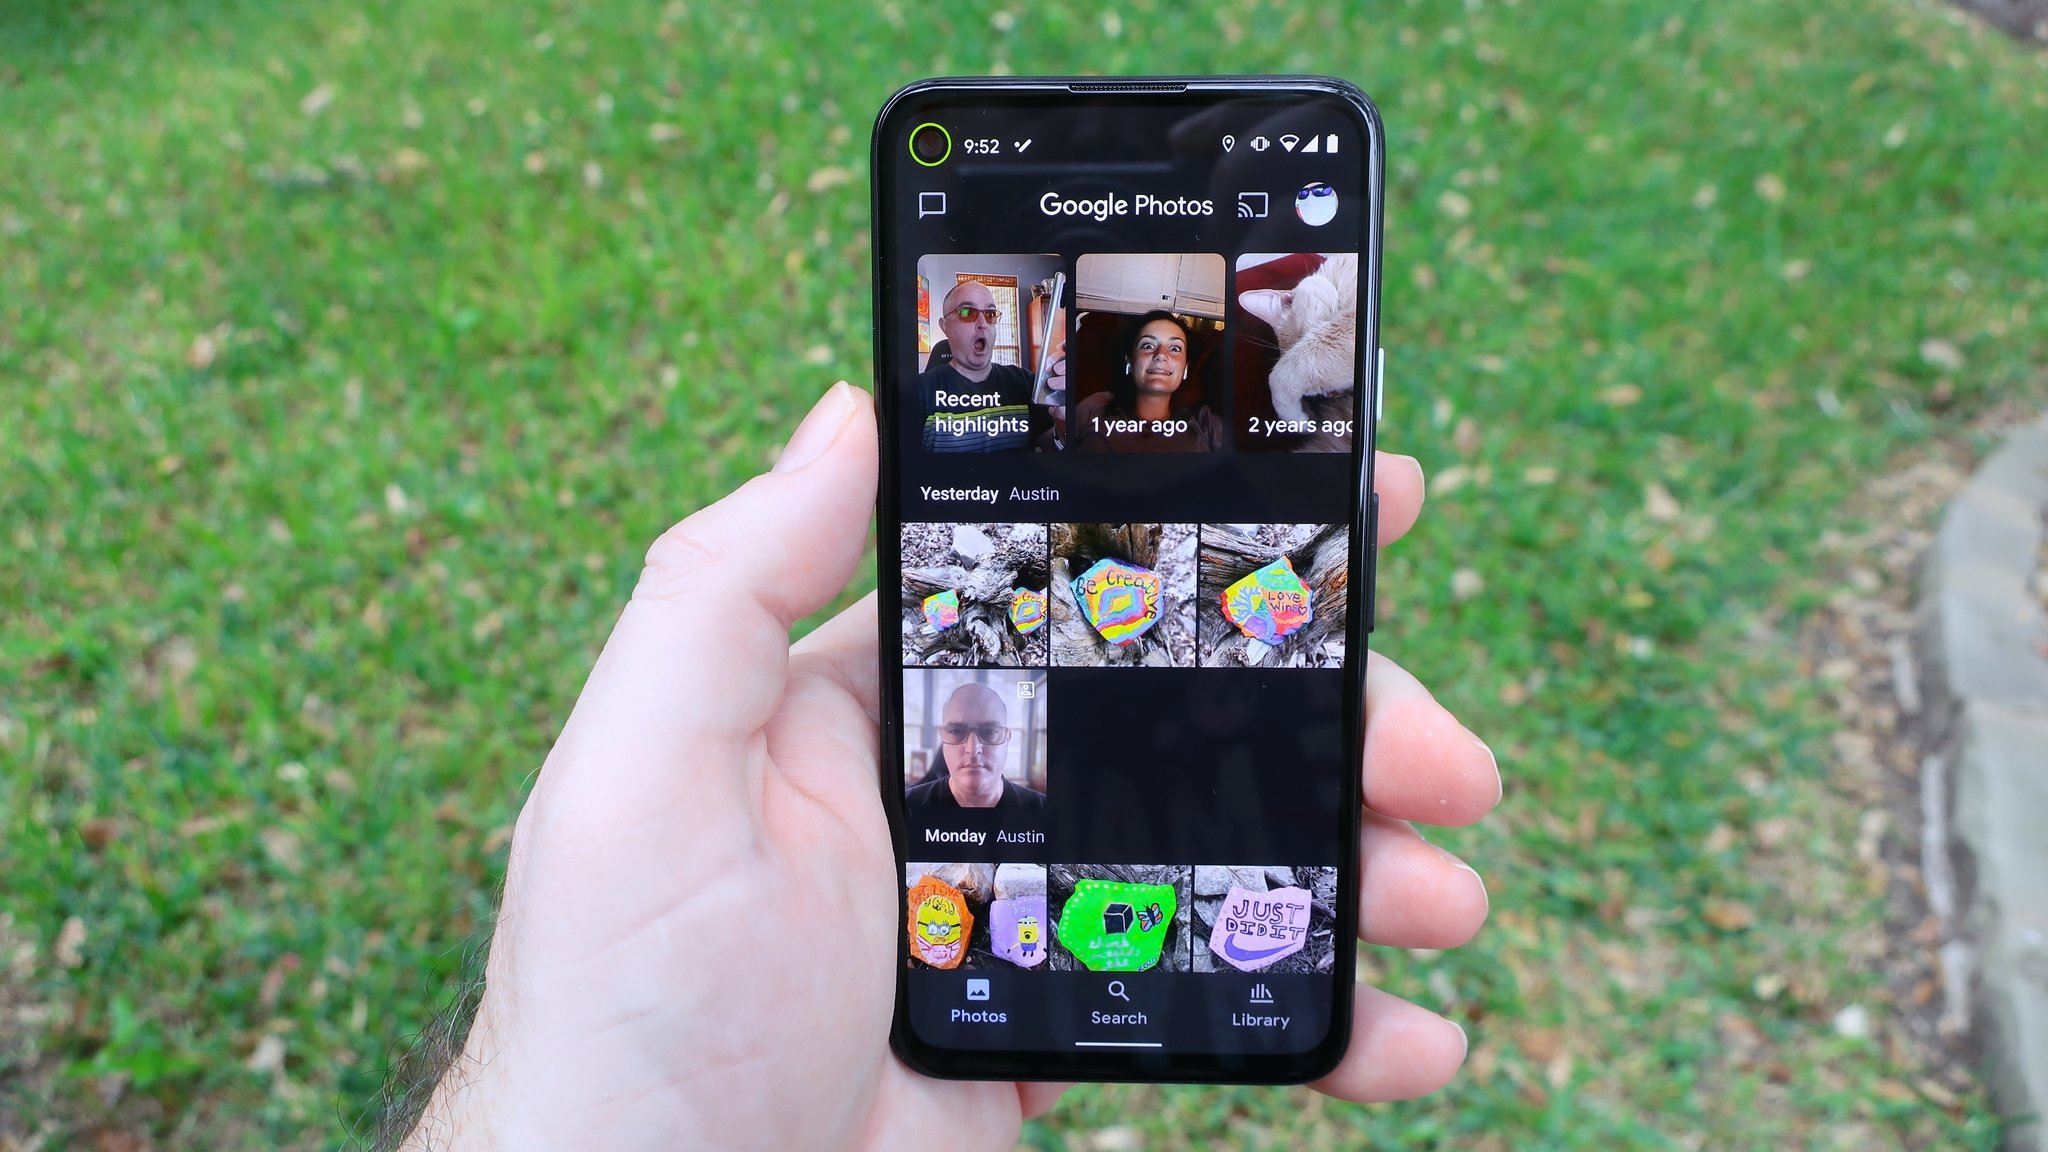
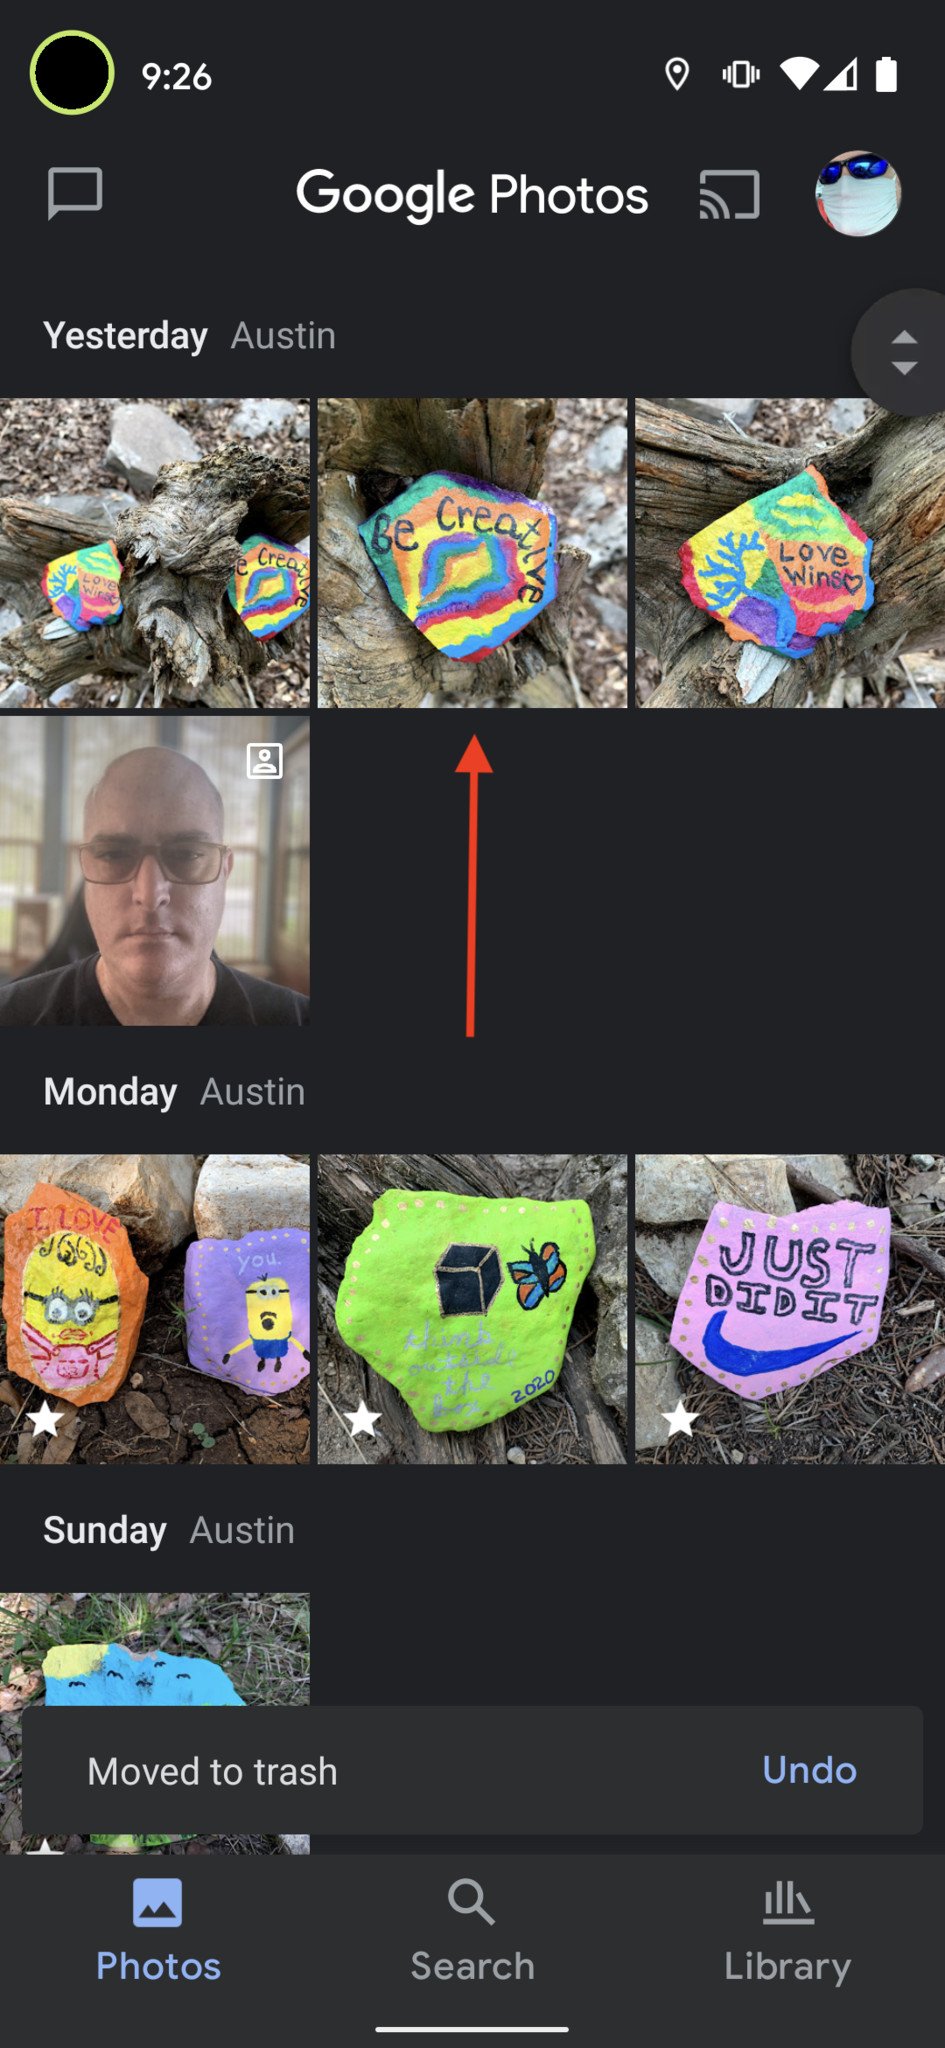
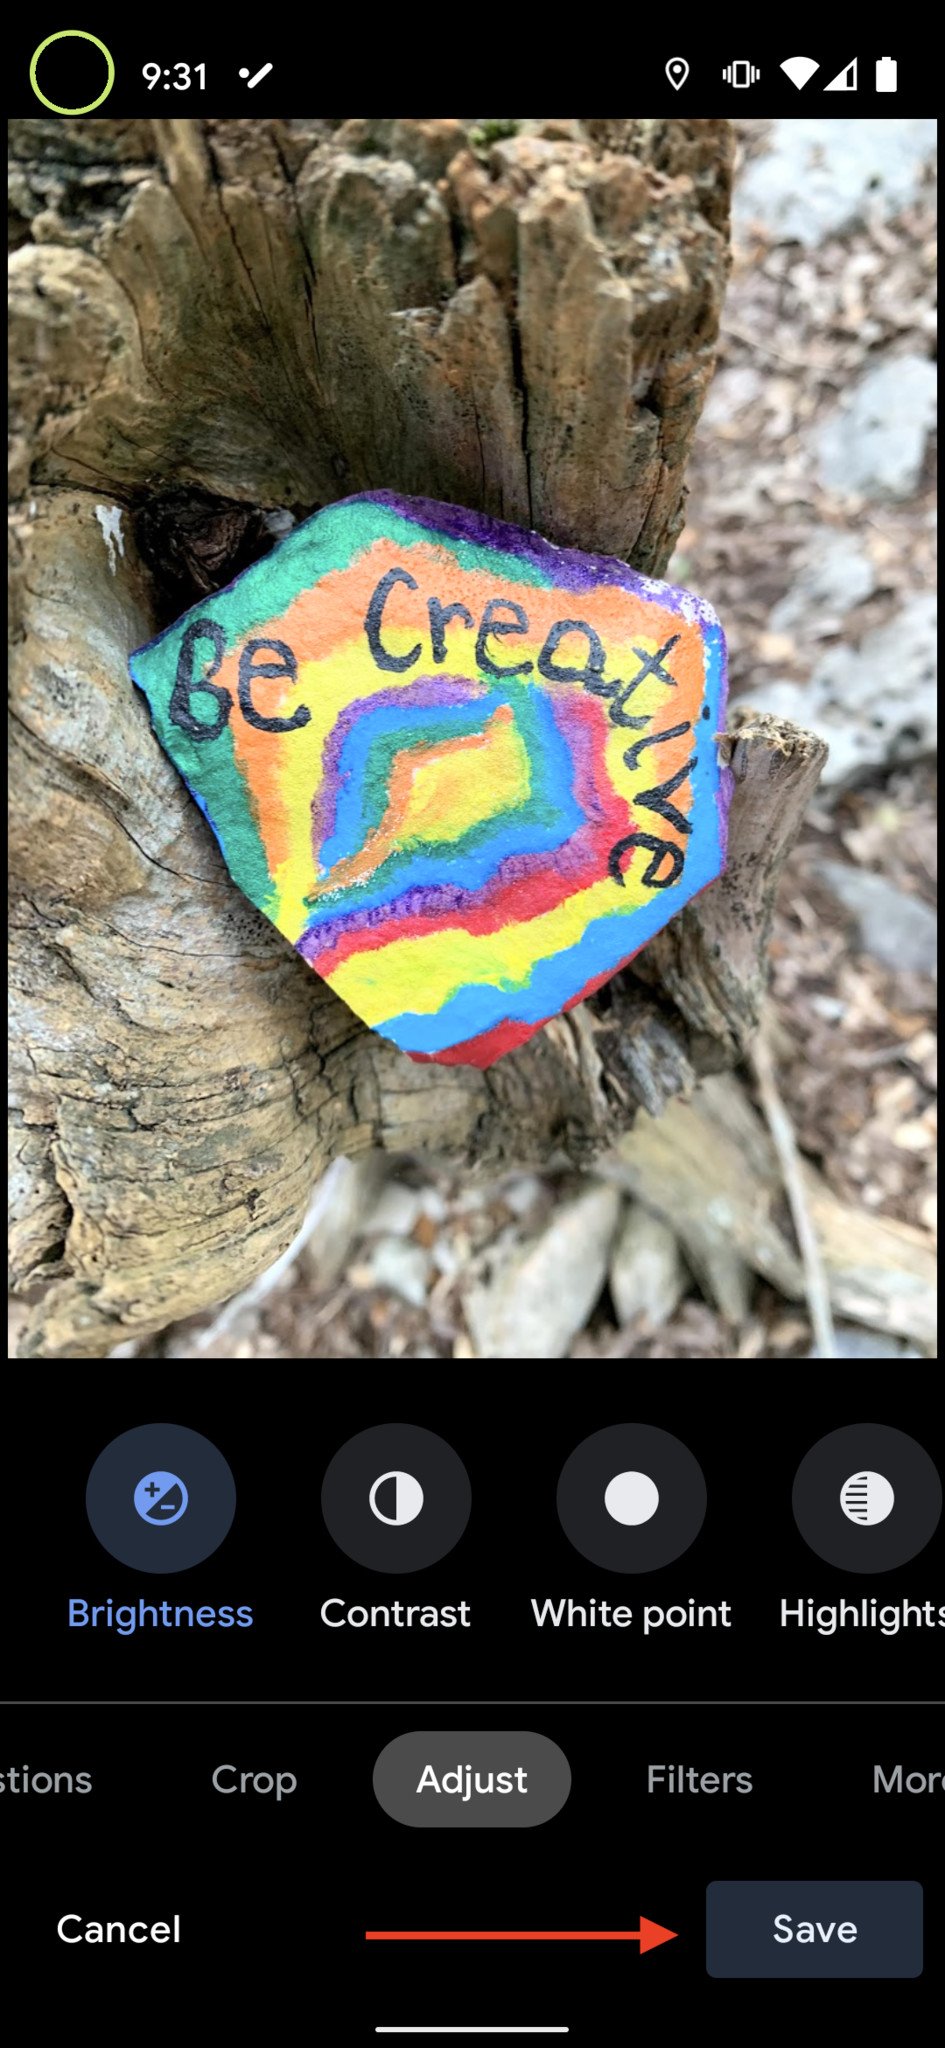
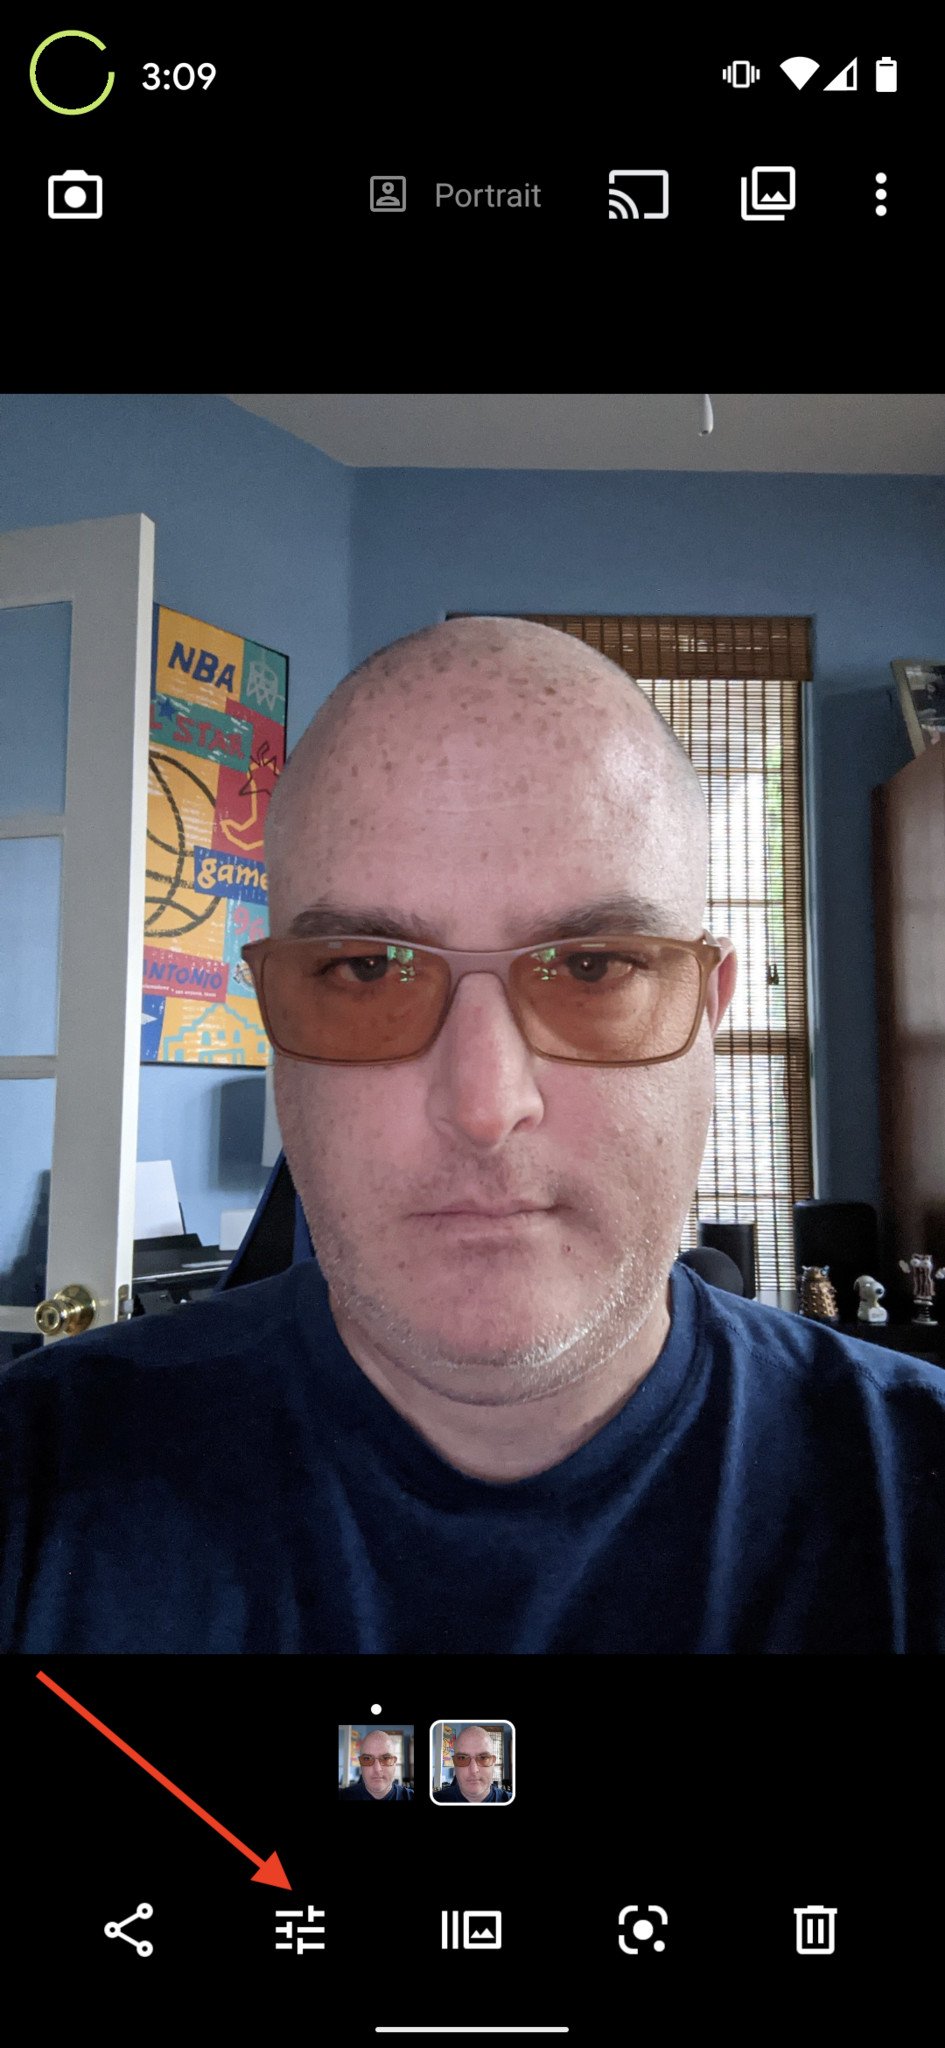
Once you receive the Google Photos app update, editing your photos (whether you just took them or they are already in your archive) is easier than ever. All you need to do is tap on the photo that you want to edit, and you will see quick access to manual editing modes like brightness, contrast, saturation, tint, and warmth. Tapping into each setting presents a slider that allows you to make precisely the kind of granular edits that you want to make your photos just right.
- Open the Google Photos app.
- Tap on any photo.
-
Tap on the editing tool at the bottom of the screen (looks like three lines with slots in them).
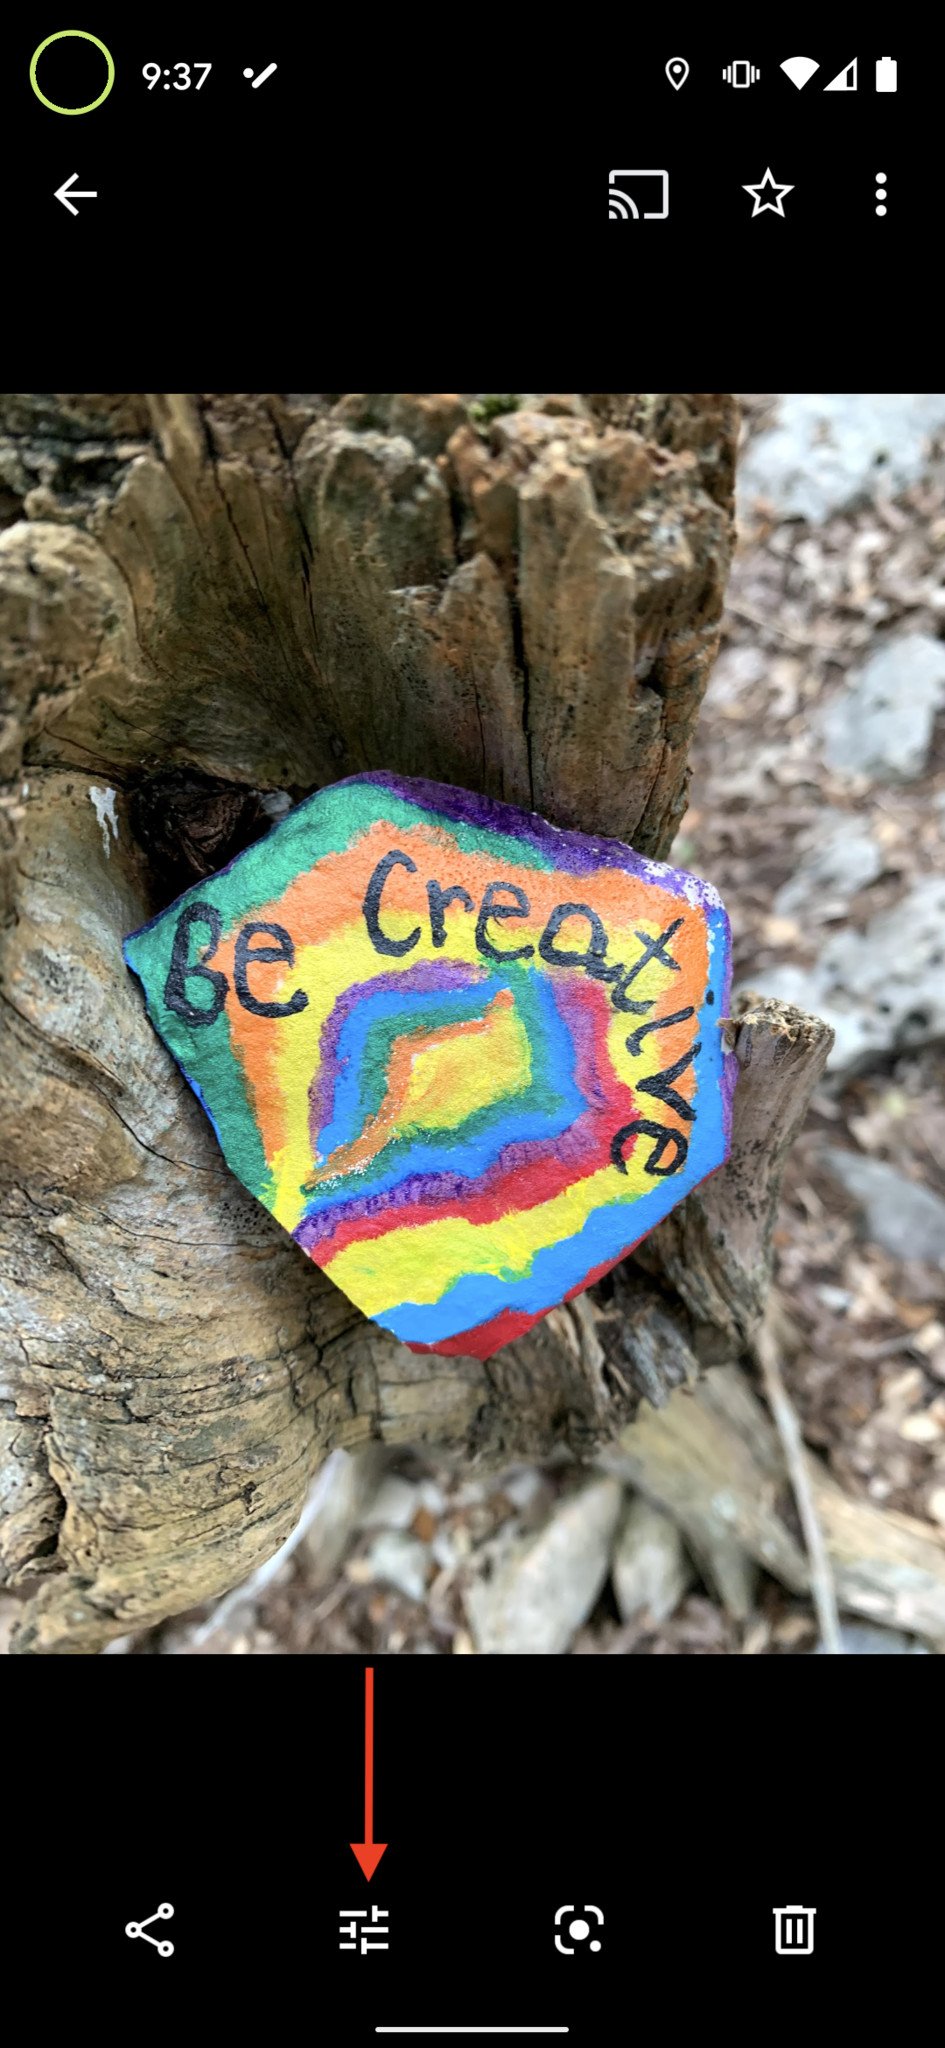
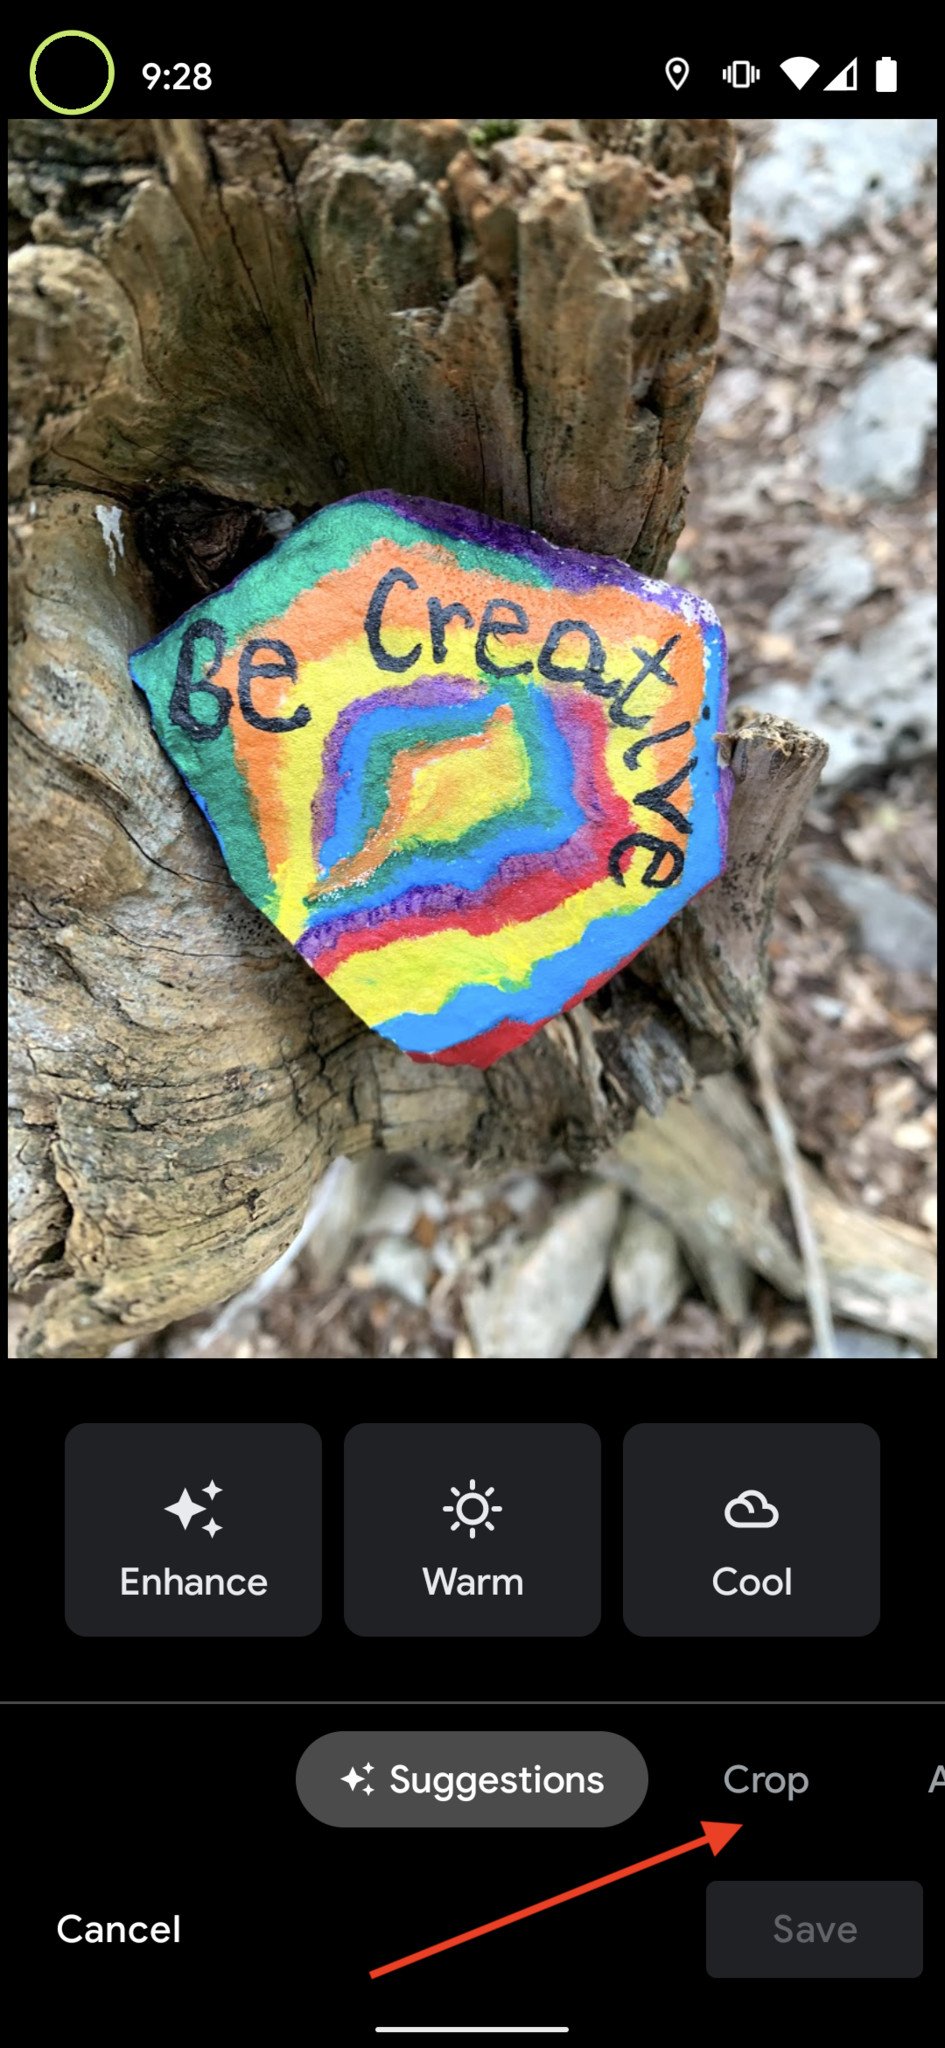
- Scroll sideways through the different editing modes such as Crop, Adjust, and Filters.
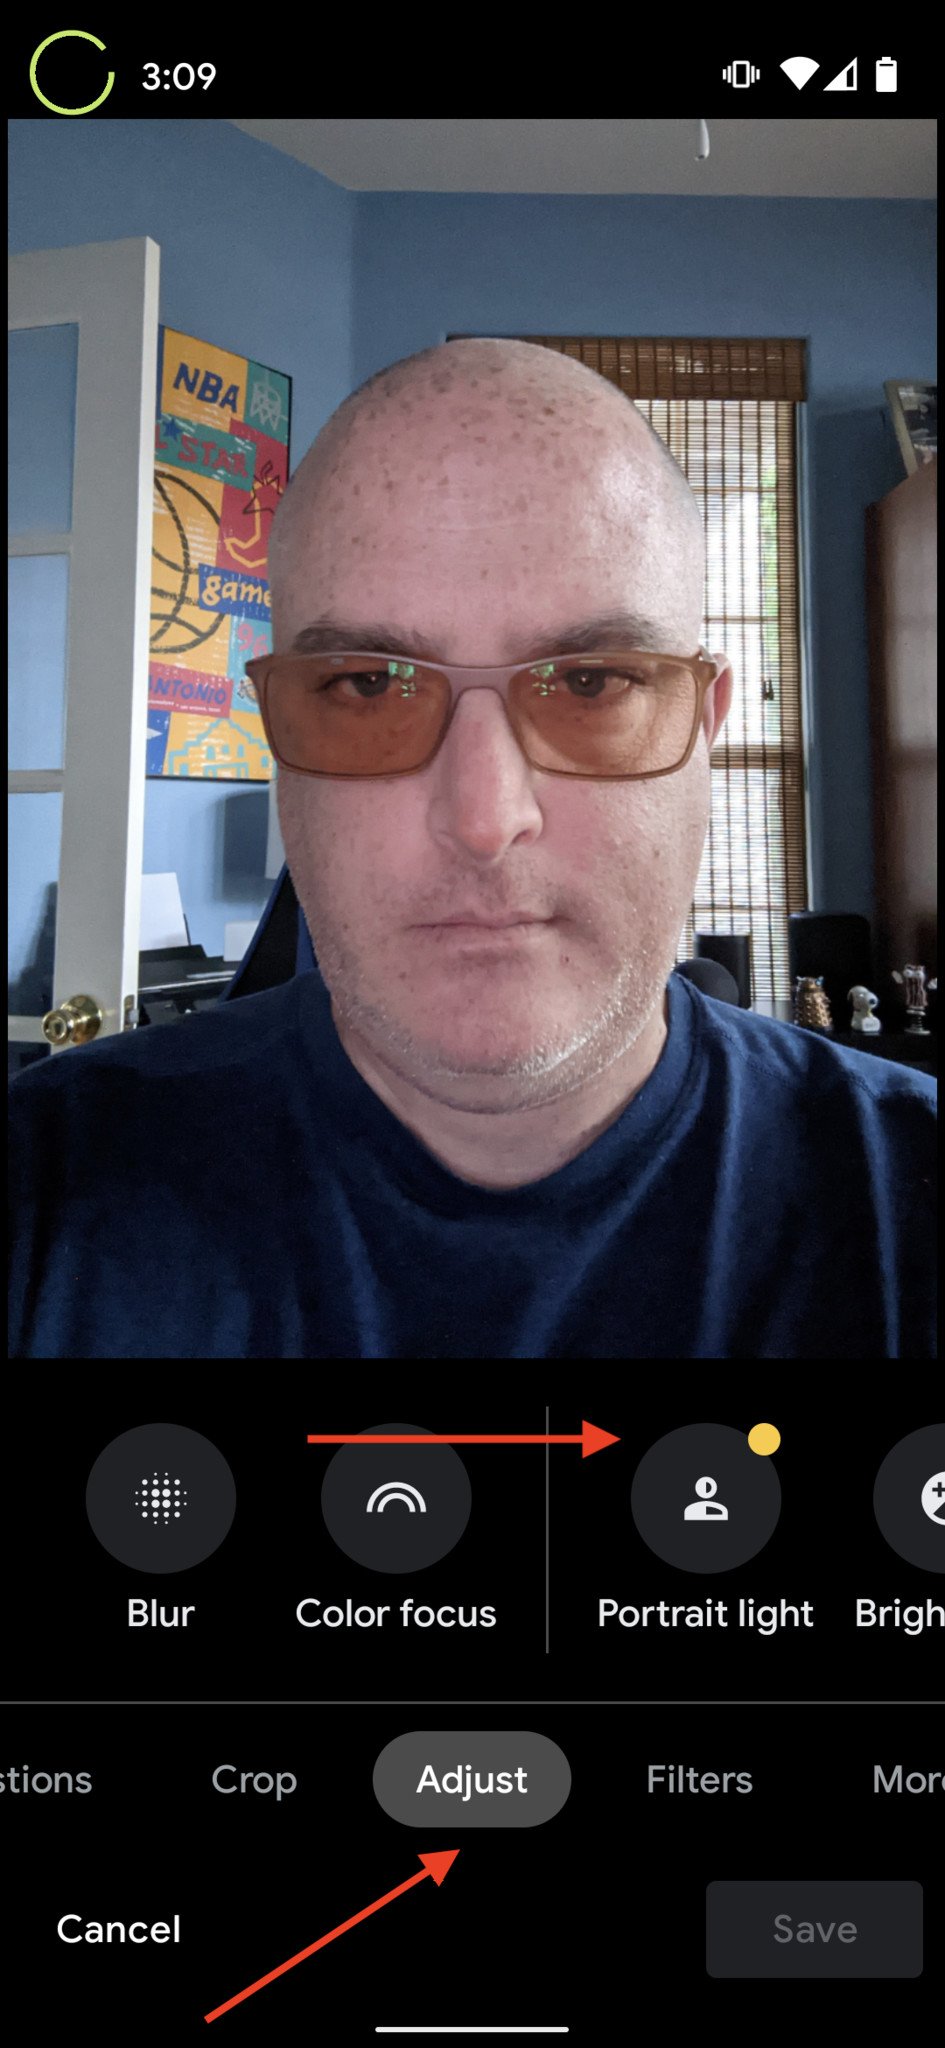
- Tap on one of the editing modes like Adjust.
-
Scroll through the controls above such as Brightness, Contrast, White Point, Highlights, Shadows, Black Point, Saturation, Warmth, Tint, Skin tone, Blue tone, Pop, and Vignette.
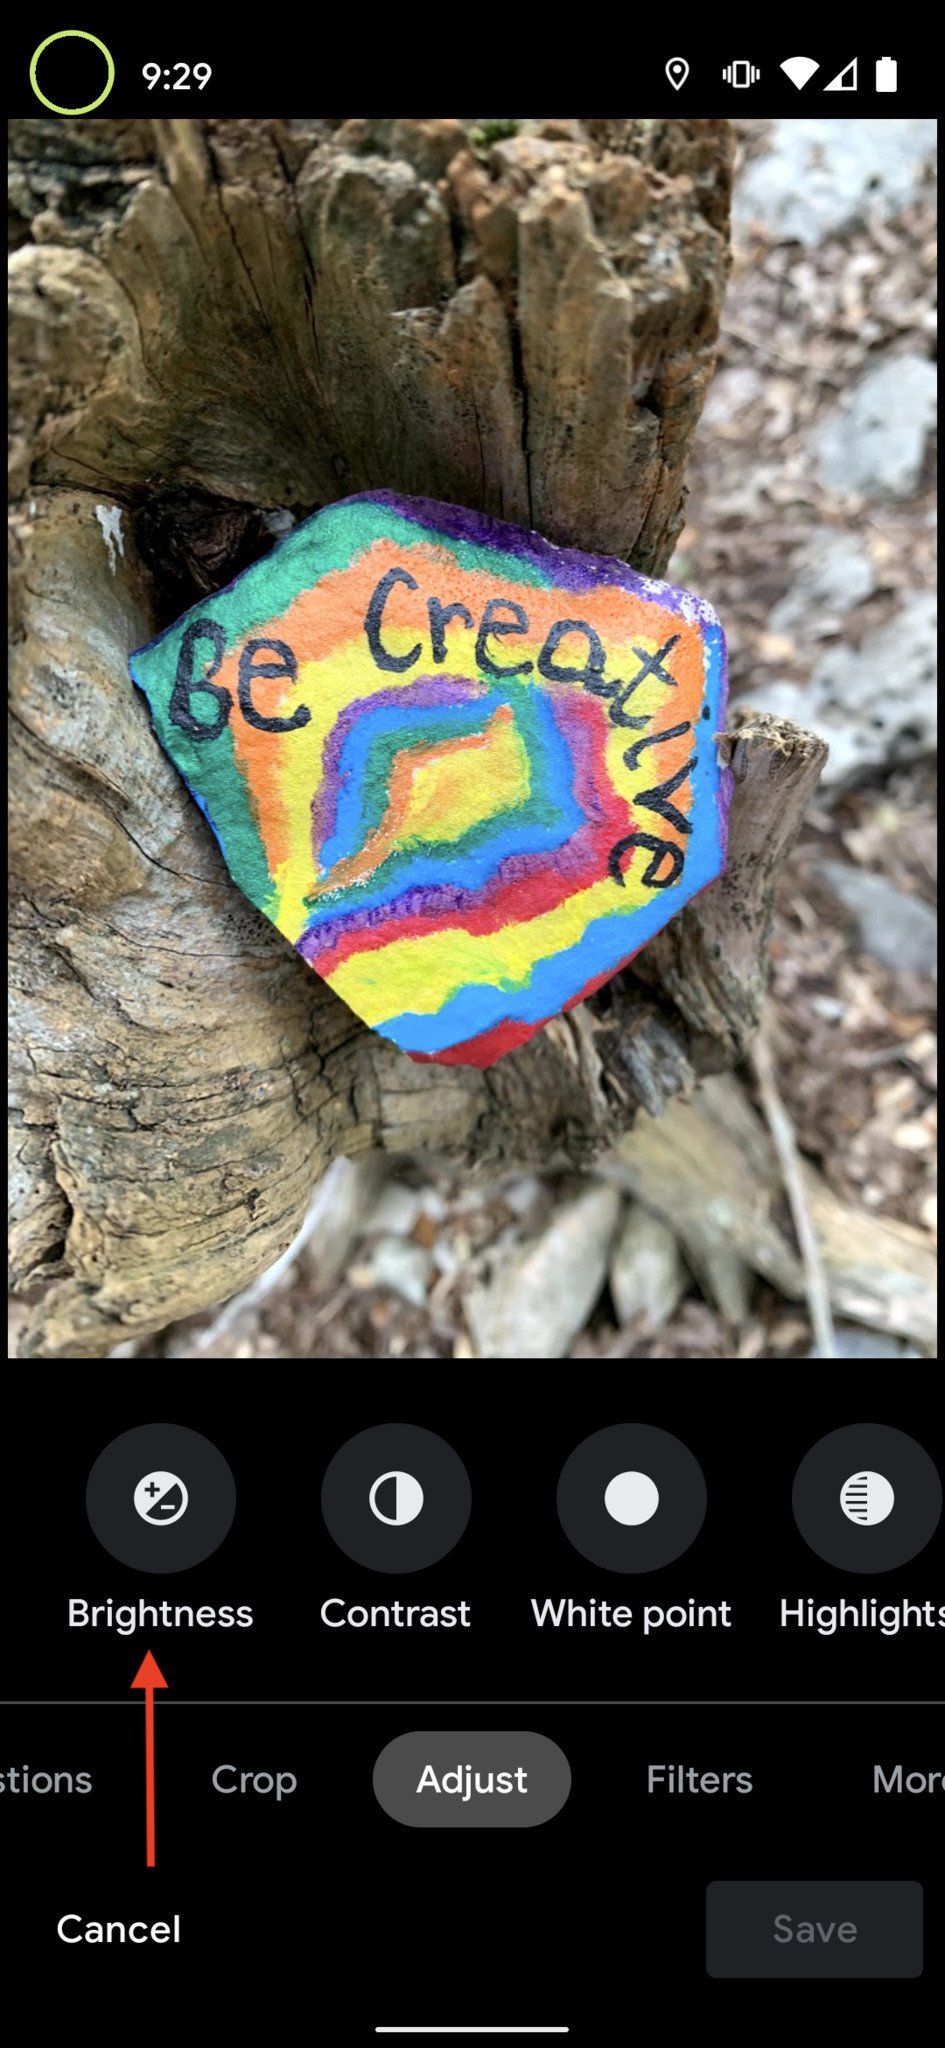
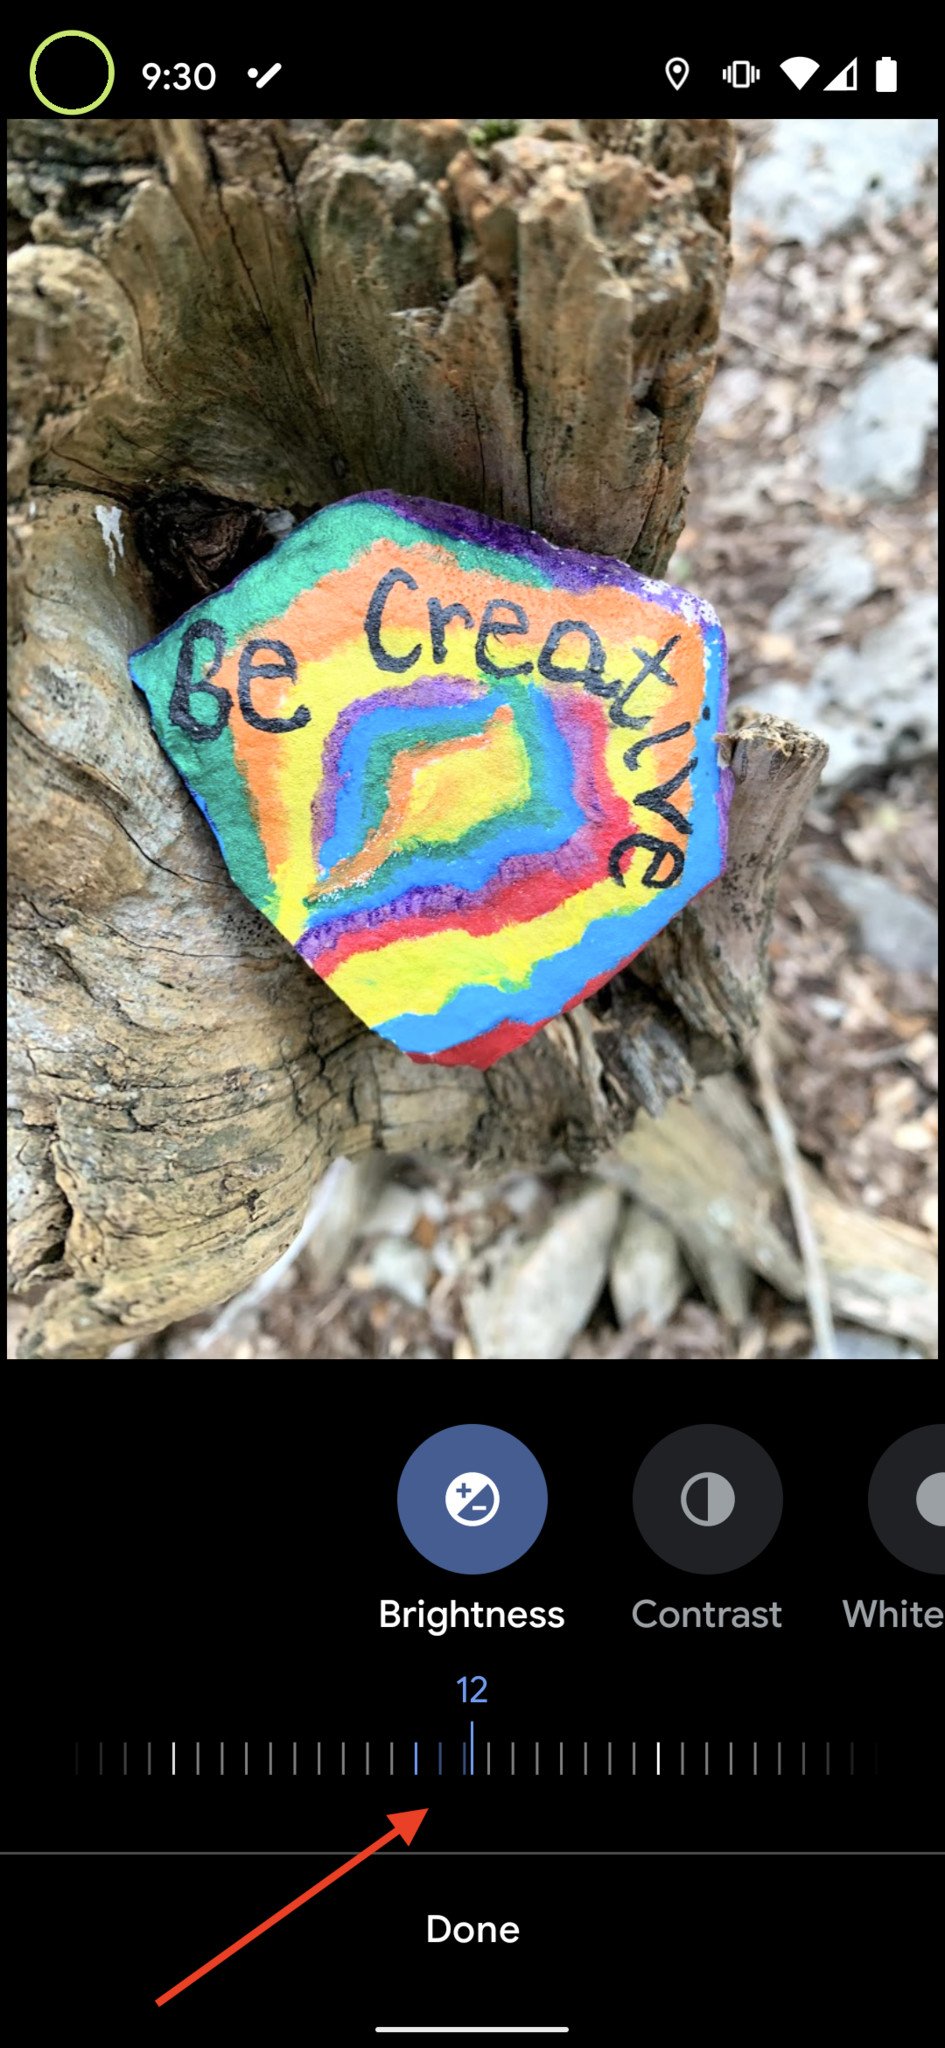
- Tap on one of the editing modes like Brightness.
- Move the slider to adjust to your taste and tap Done.
- Choose another mode to adjust and repeat the process.
-
Tap Save.
Android users should expect to see these updates rolling out right now. There is no word on when the features will land on iOS.
How to use the new Google Photos editing features: Portrait lighting effects
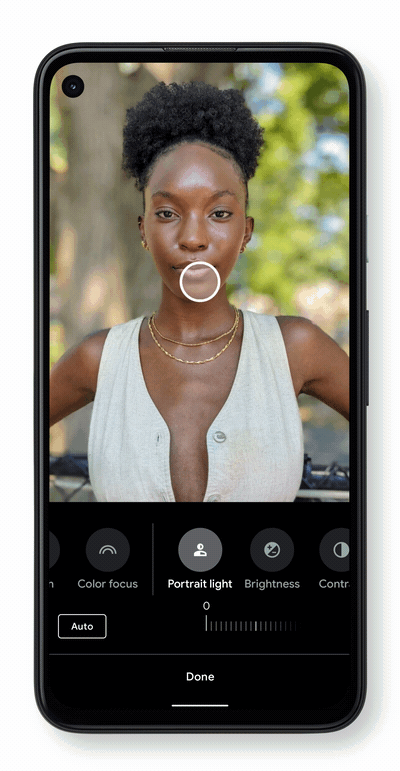
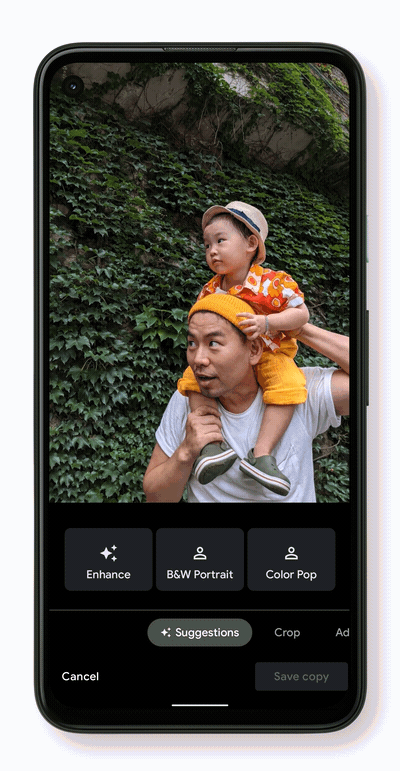
This new editing mode might just be the most exciting one announced by Google. With the help of Google's advanced AI and machine learning, Google Photos users can make remarkable adjustments with lighting and portrait effects after the shot has been captured. As with the other manual controls mentioned above, portrait lighting will be easily accessible in the editing menu, with granular slider controls and gestures that allow you to tap on the photo and apply just the right degree of background blur around your subject. These features will work regardless of whether you first took the photo in portrait mode or not.
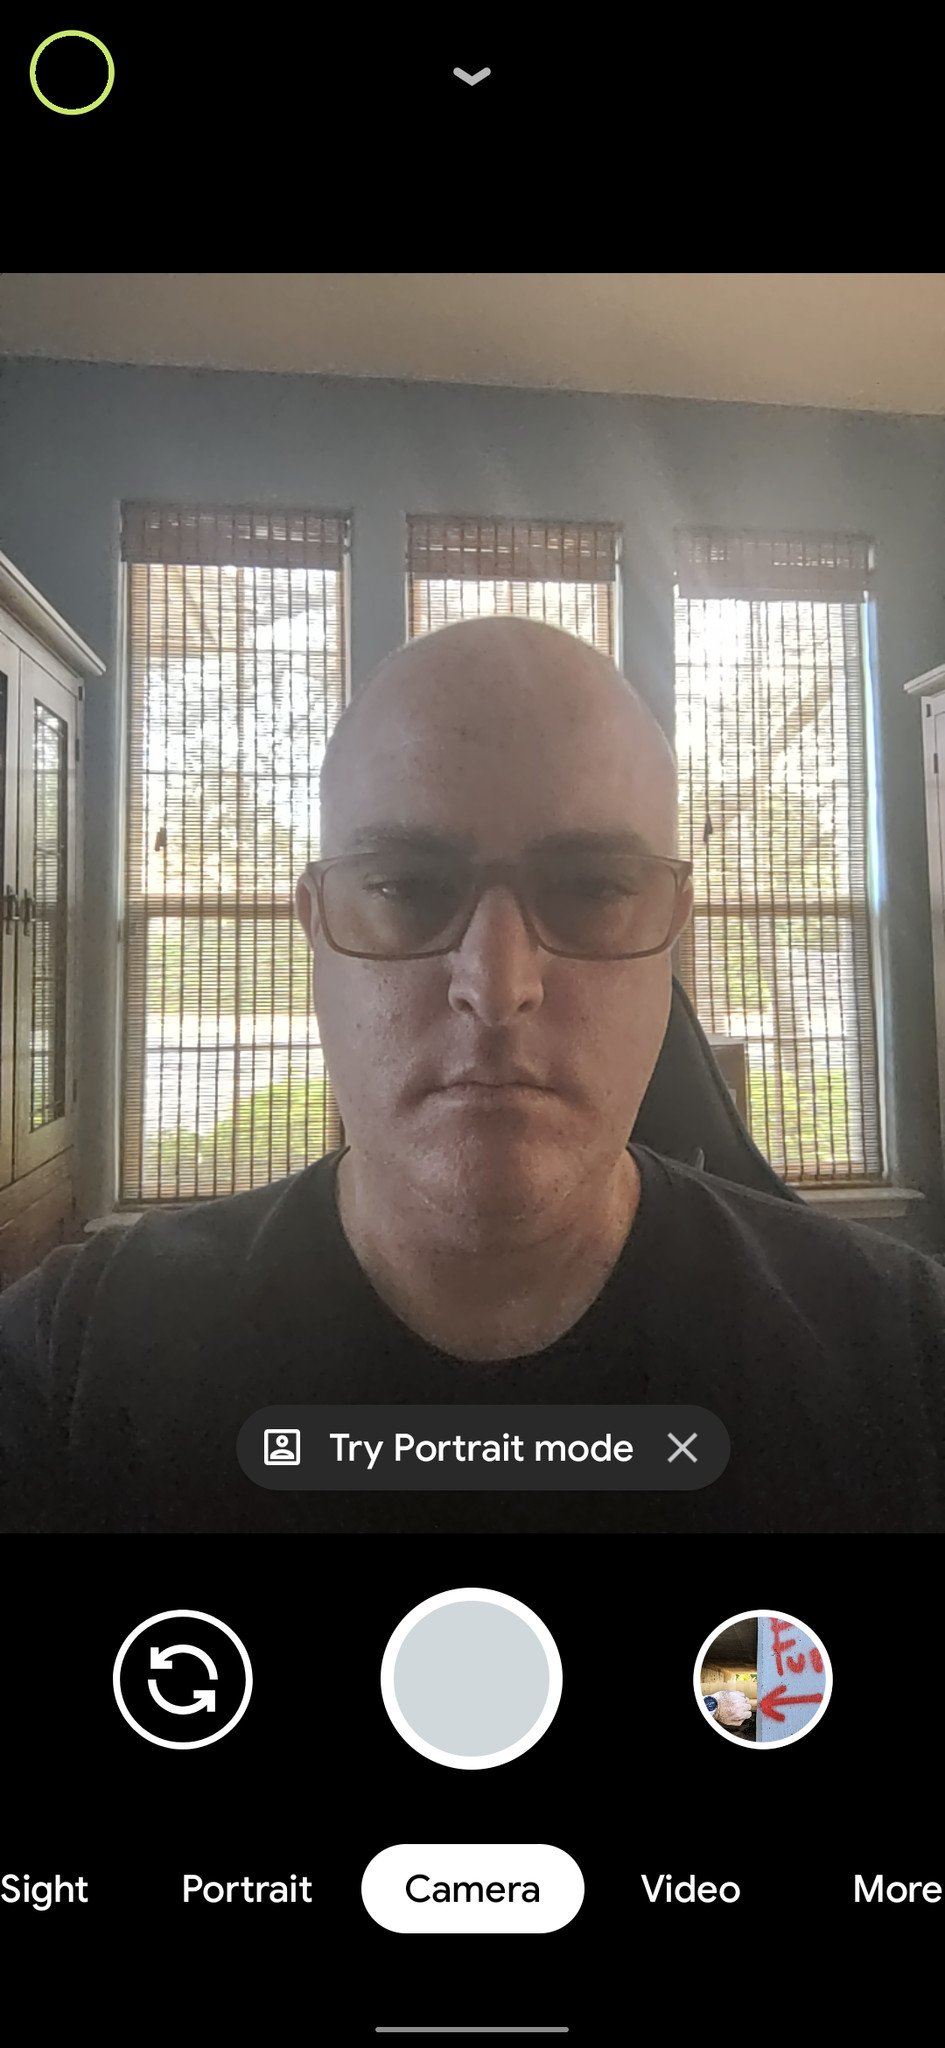
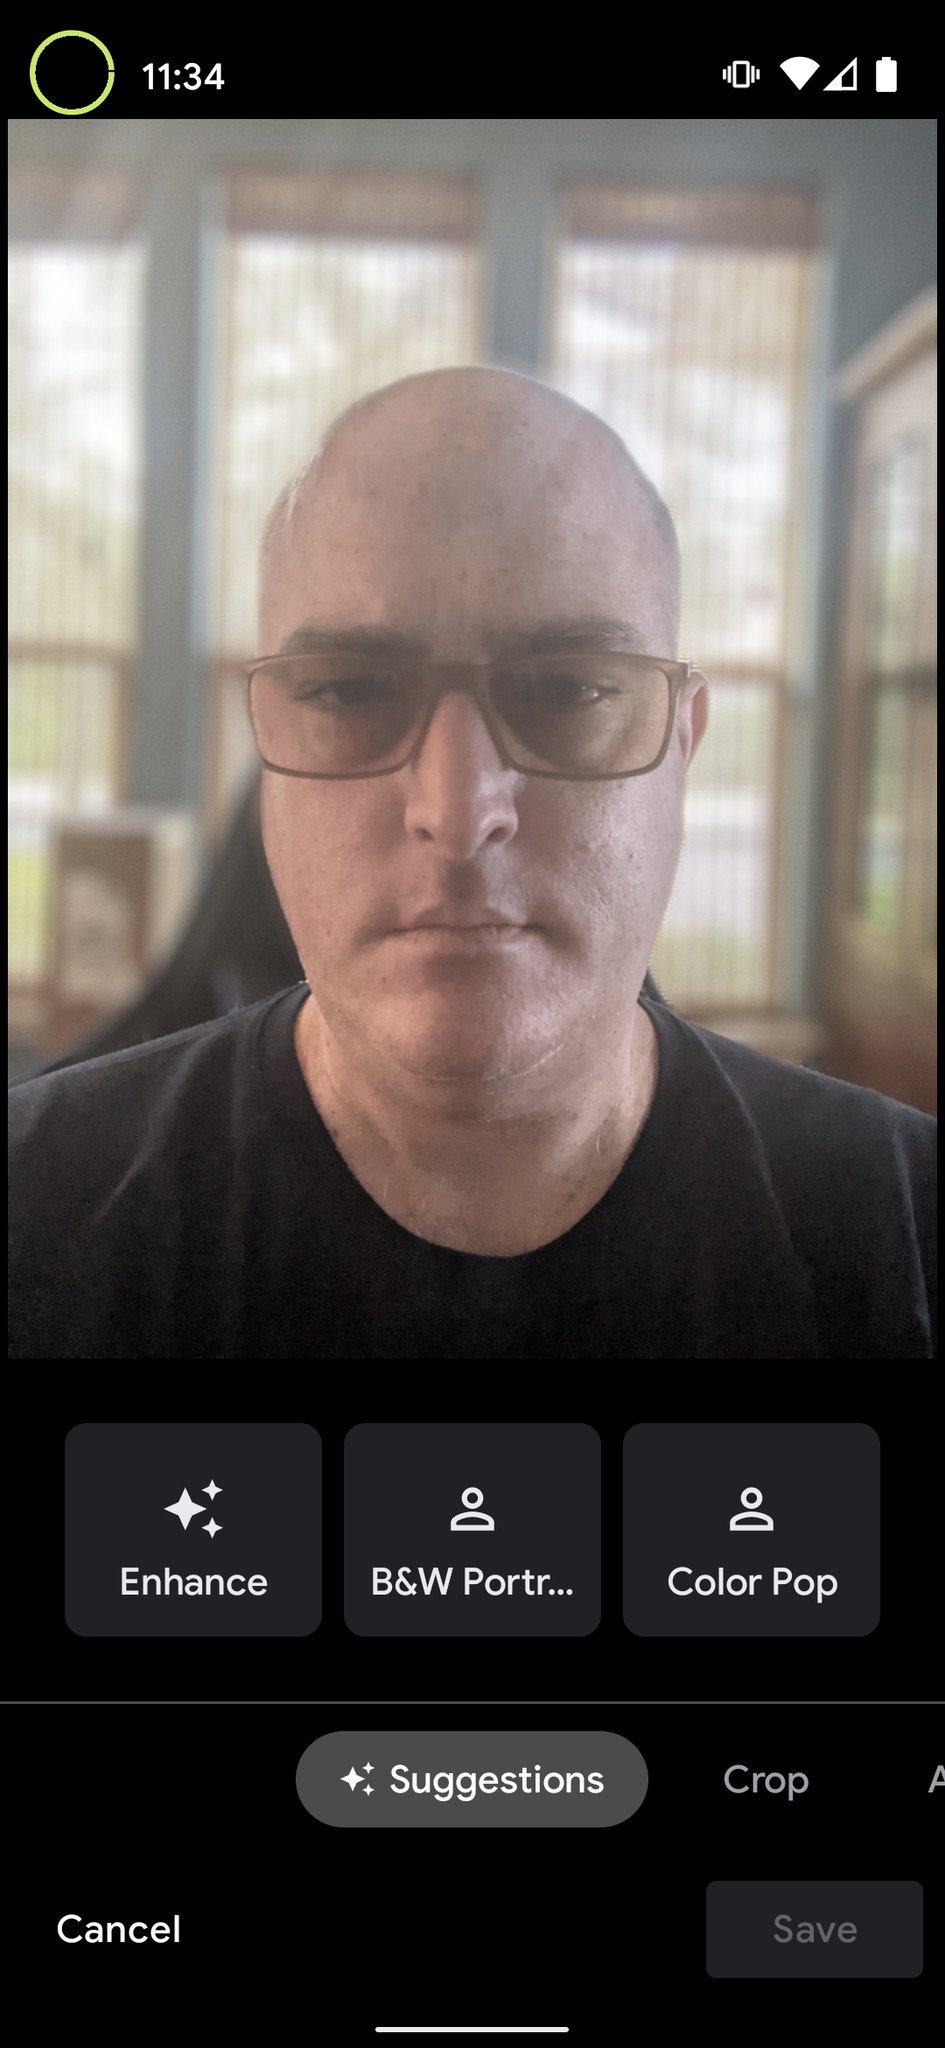
As you can see from the first two images of me, as soon as you take a selfie or image capture, Google Photos will ask if you want to try Portrait mode. If you tap that, you will get some quick toggles to enhance your portrait or change it to a black and white image or introduce a pop of color.
However, if you want to adjust portrait lighting effects after a shot has been captured, here's what you do.
- Select a portrait photo.
- Tap on the editing tool at the bottom of the screen (looks like three lines with slots in them).
- Scroll through the ediing modes, and tap on Adjust.
-
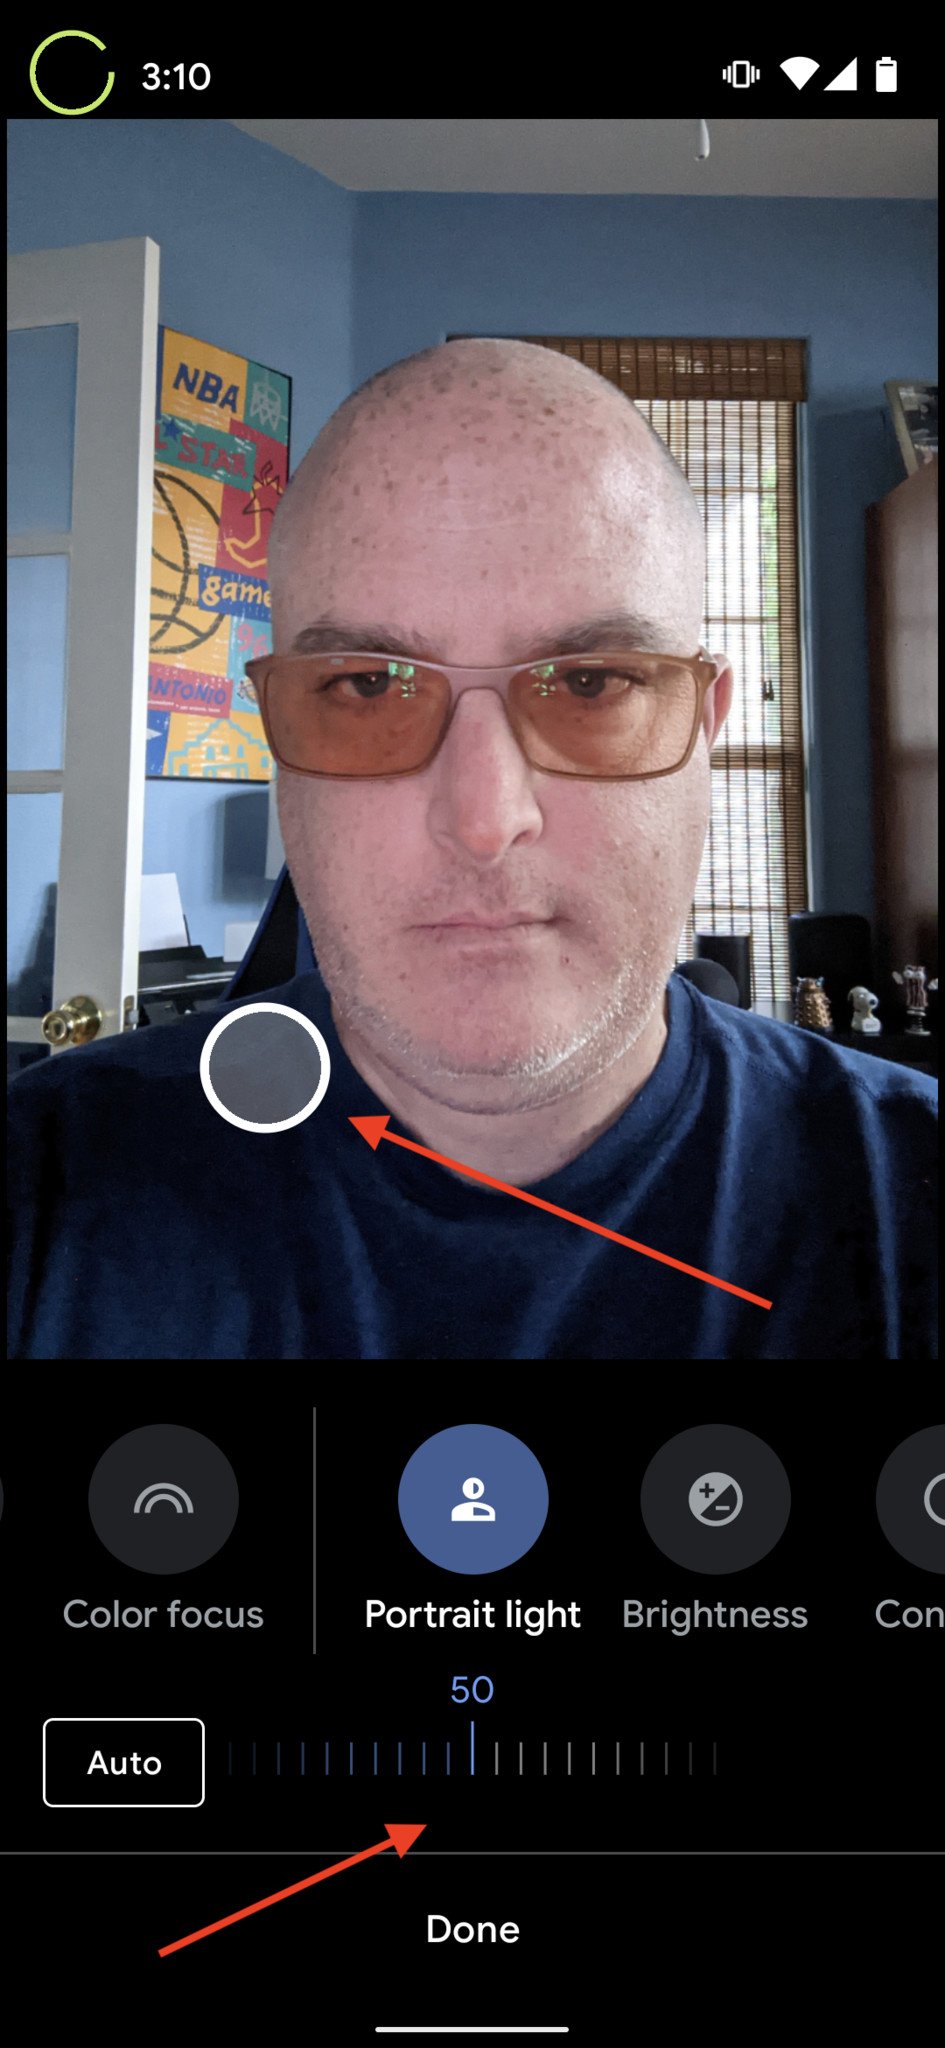
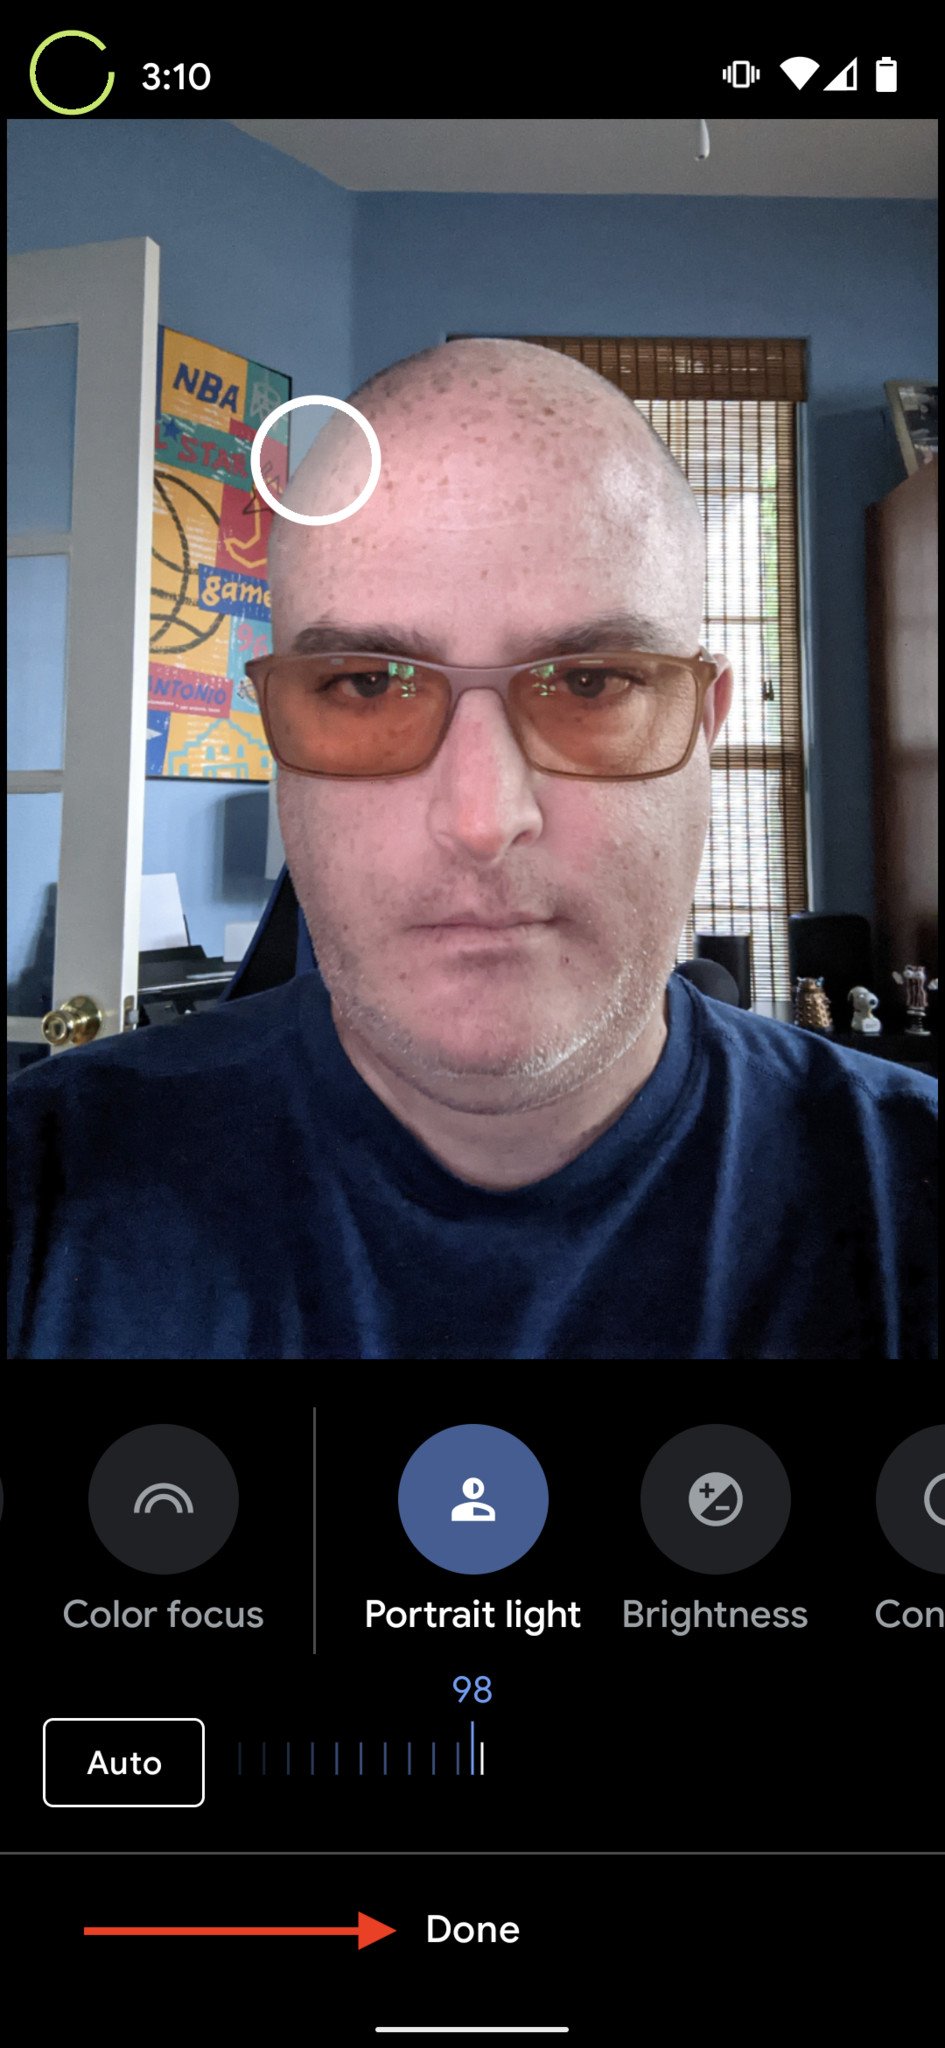
Tap on Portrait light.
- Use the slider at the bottom to select the optimal portrait lighting level, or tap auto.
- Use your finger to slide the circle around your face to see where you want the lighting effect to be.
- Tap Done.
-
Tap Save Copy.
The portrait lighting feature first debuted with the announcement of the Google Pixel 5 and Pixel 4a XL, but has already started rolling out to older Pixel models, like my Pixel 4a.
Other new Google Photos editing features: AI suggestions

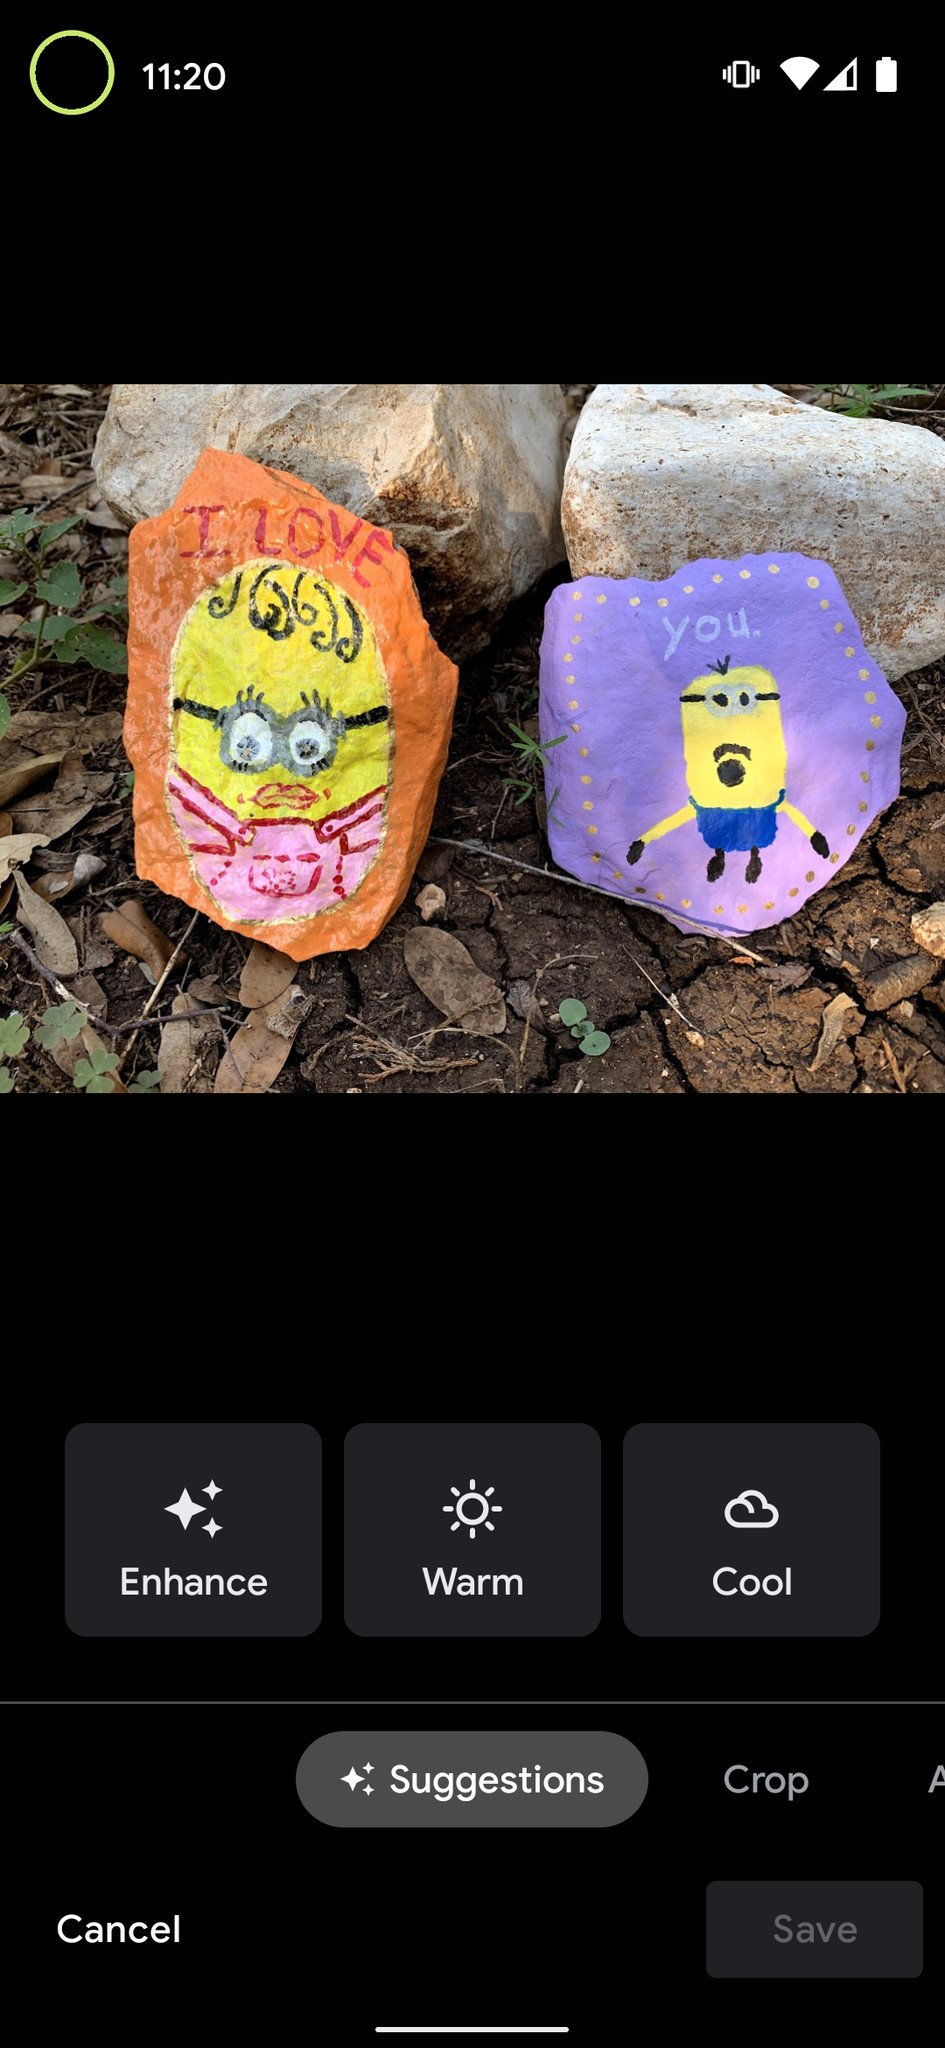
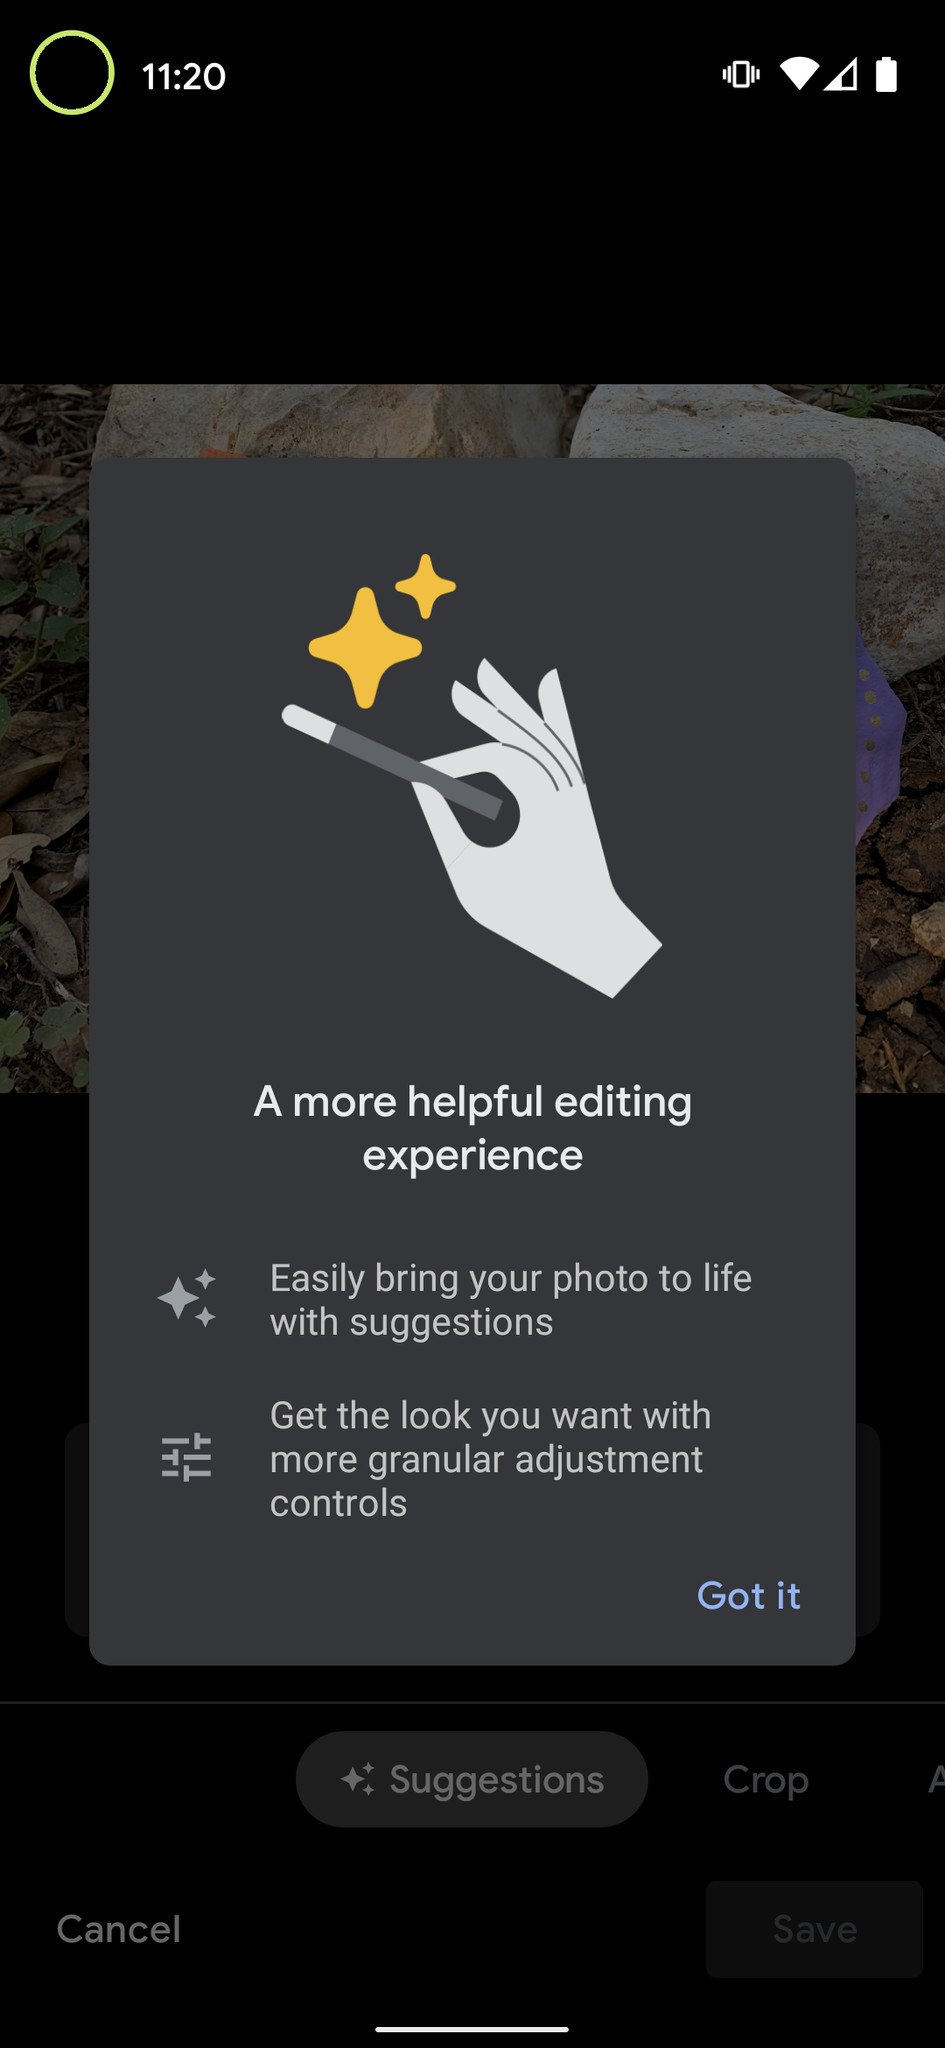
One of the best upgrades to the Google Photos app is something that you don't technically need to search for or implement, and that is Google's improved AI suggestions feature. Google Photos has already offered users tips on fixing lighting or creating animations, but those were inconsistent at best. Now, the app will more consistently surface suggestions that the AI thinks will improve your photos, which you can accept, reject, or accept and tweak further in the manual editing controls.
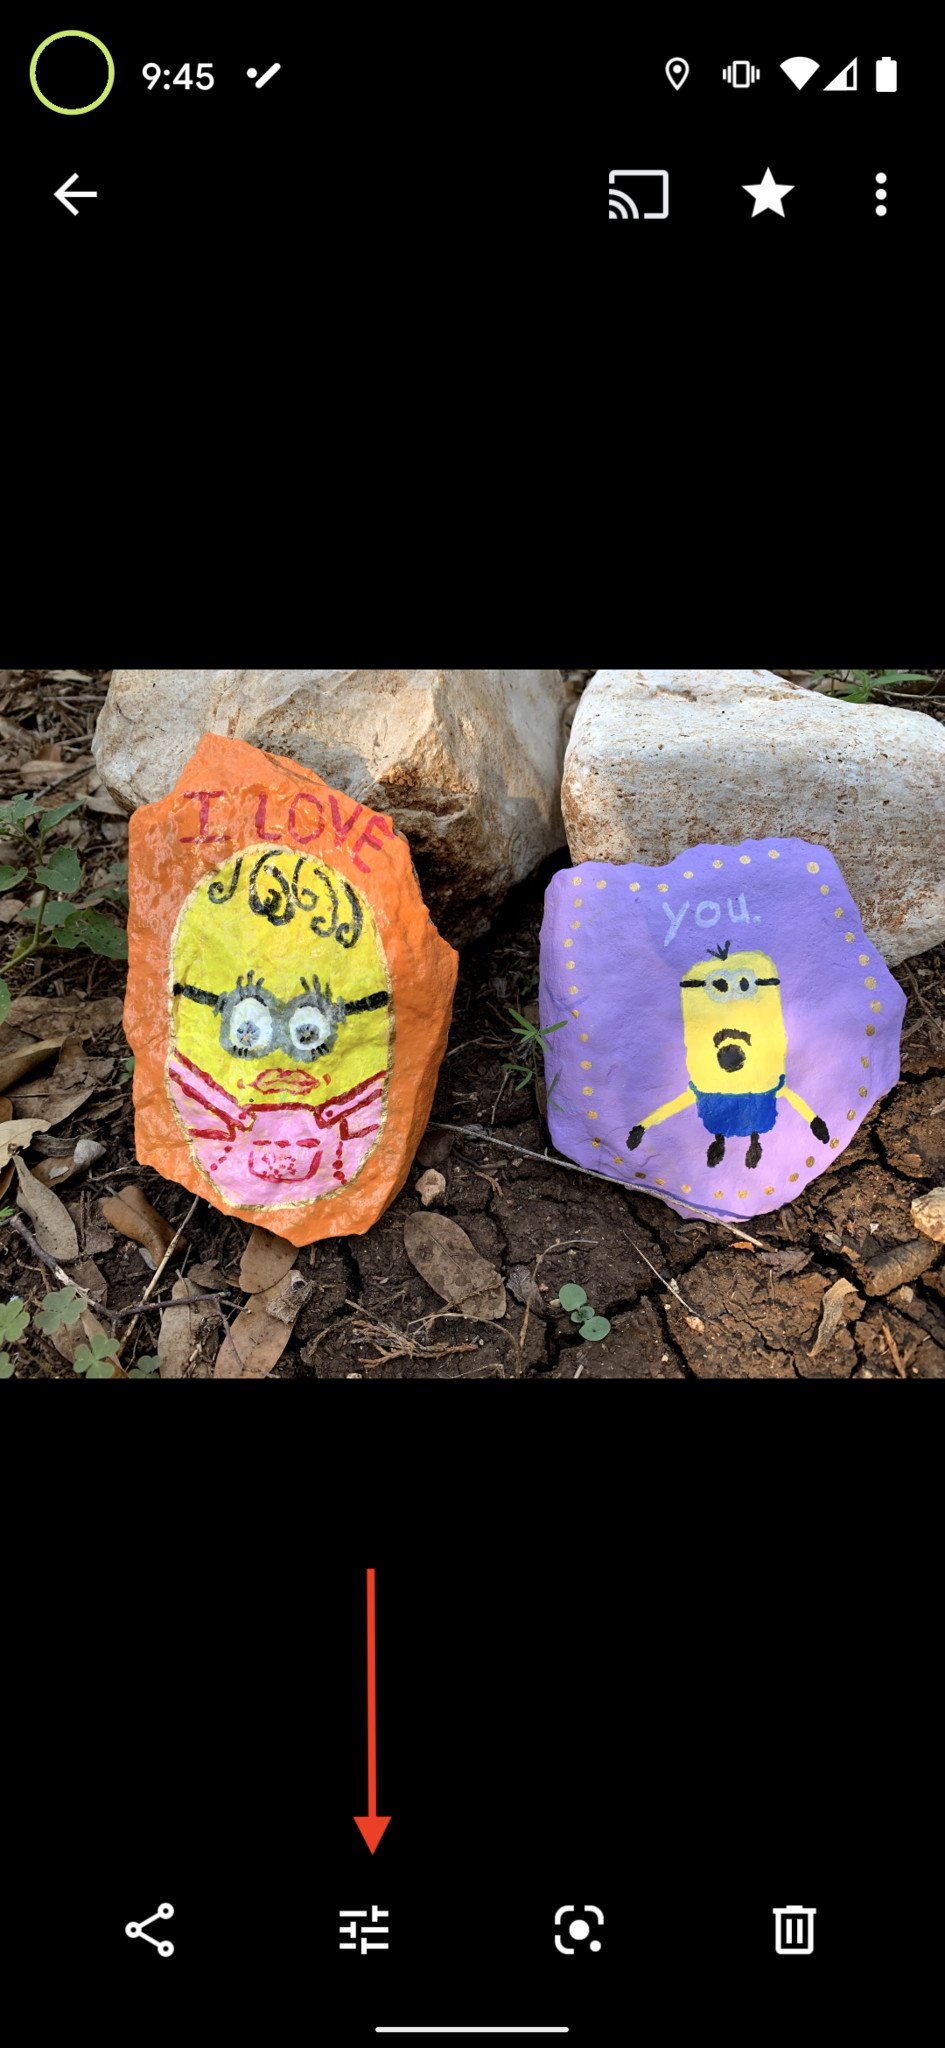
- Open the Google Photos app.
- Tap on any photo.
- Tap on the editing tool at the bottom of the screen (looks like three lines with slots in them).
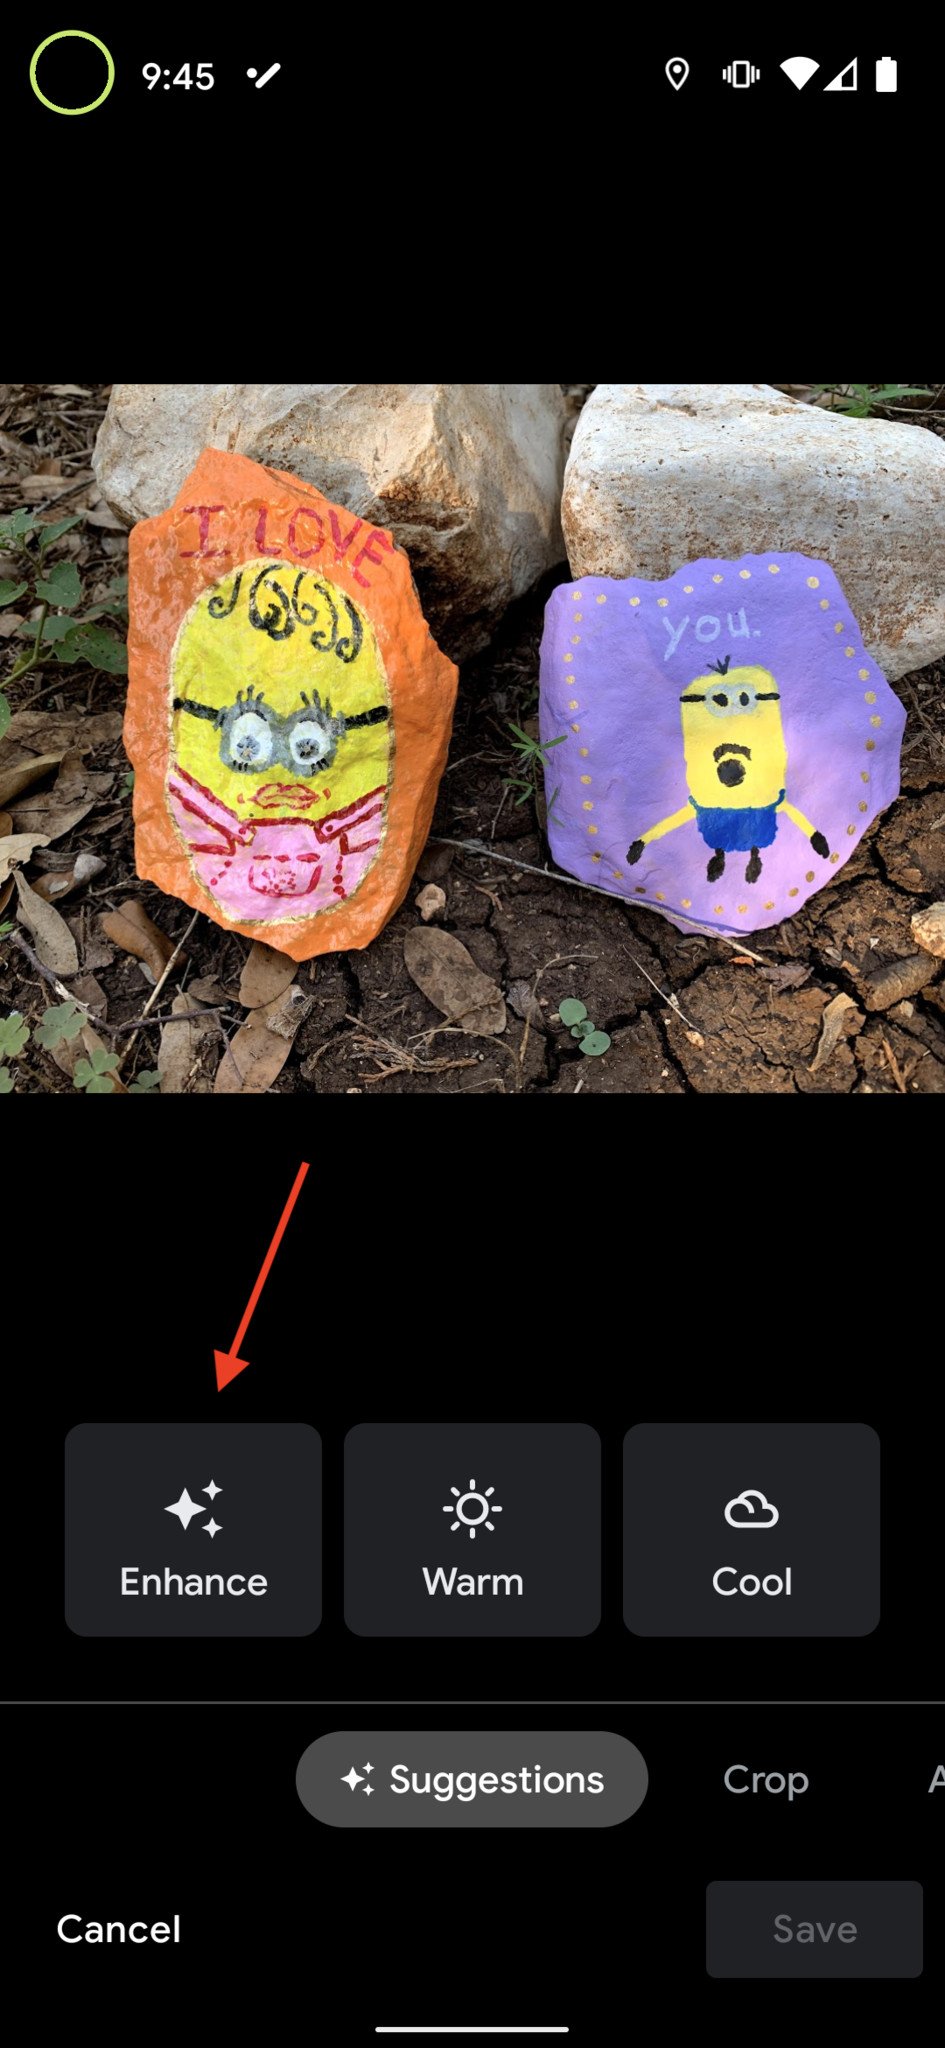
-
You should now see the editing tools slider at the bottom of the screen, with some AI suggestions above it that include Enhance, Warm, and Cool. Tap on one of these options, such as Enchance.
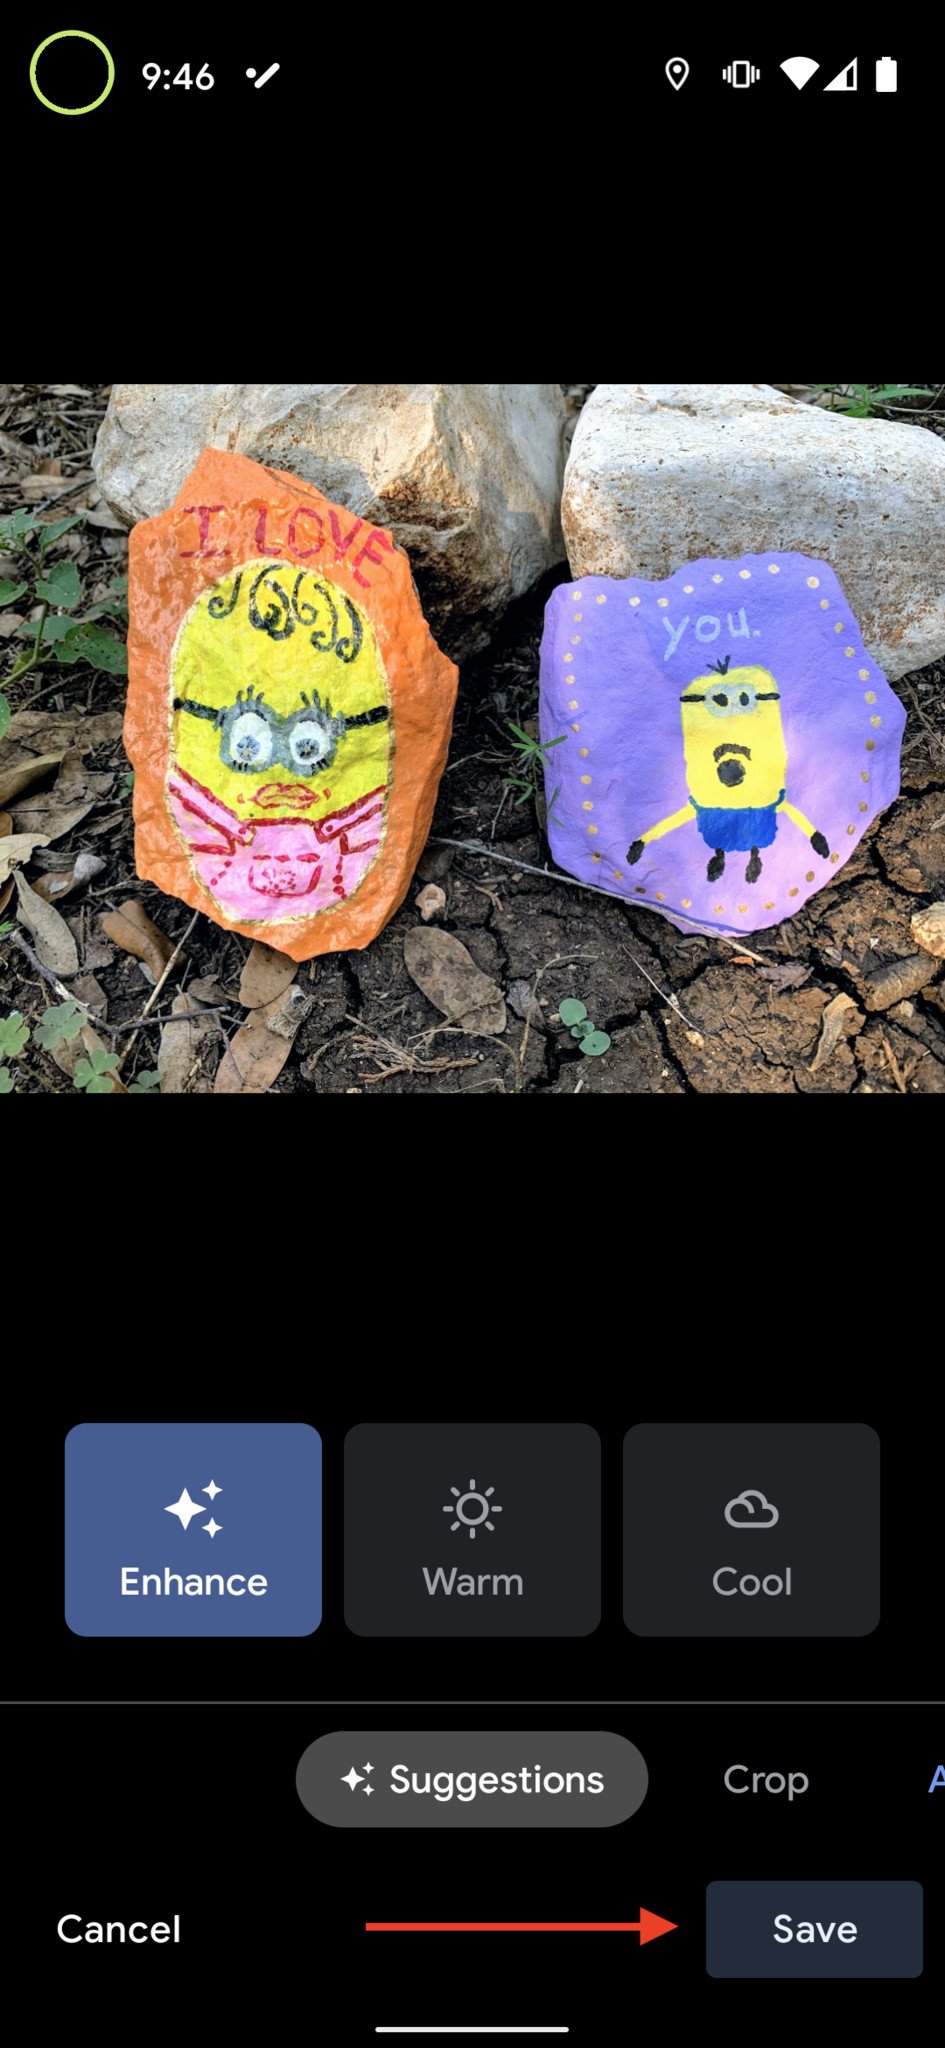
- Google Photos AI will auto-magically apply what it thinks are the right lighting and coloring filters to make your image look better.
- If you like what you see, tap Save. If not, continue experimenting with the Warm and Cool buttons, or try the more granular manual controls that we covered earlier in this article.
Google has said that new AI suggestions will first come to Pixel phones and that it will introduce more kinds of suggestions over the course of the year during quarterly Pixel feature drops.
Our top equipment picks
Many of these new features will come first to the Pixel 5 and Pixel 4a 5G phones, two of the best Android phones of 2020.
Google Pixel 5
![]()
$699 at Amazon $699 at Best Buy $699 at B&H
The top of the line Pixel 5 brings back the beloved rear-fingerprint sensor and aluminum casing and brings 5G and an ultra-wide-angle camera to the mix.
Google Pixel 4a 5G
![]()
$500 at the Best Buy $499 at the B&H
The largest of the 2020 Pixels features a 6. display and 5G radio support, as well as a beloved 3.5mm headphone jack.
from Android Central - Android Forums, News, Reviews, Help and Android Wallpapers https://ift.tt/2FdYp8x
via IFTTT
No comments: